Clean the Door Frame Thoroughly
Before you apply primer or paint, you’ll need to remove all accumulated dust and debris from your door frame, since even fine particles can create surface imperfections that compromise paint adhesion and durability. Use a soft cloth, duster, or vacuum with a nozzle attachment to eliminate dirt from all areas, including grooves and molding. A small, clean paintbrush effectively dislodges dust from detailed trim and crevices.
Next, wipe down frame surfaces with a mild dish soap solution, one tablespoon per gallon of water. Work methodically from top to bottom, paying special attention to corners and seams. Rinse thoroughly with a damp, soap-free cloth, then pat dry with microfiber towels. To prevent excess water from leaving marks, wring out your cloth well before applying it to the door frame. For stubborn stains or mold growth, use fine sandpaper to gently abrade the affected areas before proceeding. Consider caulking between the door frame and wall to seal gaps that could allow moisture penetration and compromise weather resistance. Ultimately, inspect for issues such as stains, greasy spots, or mold that require targeted treatment before priming.
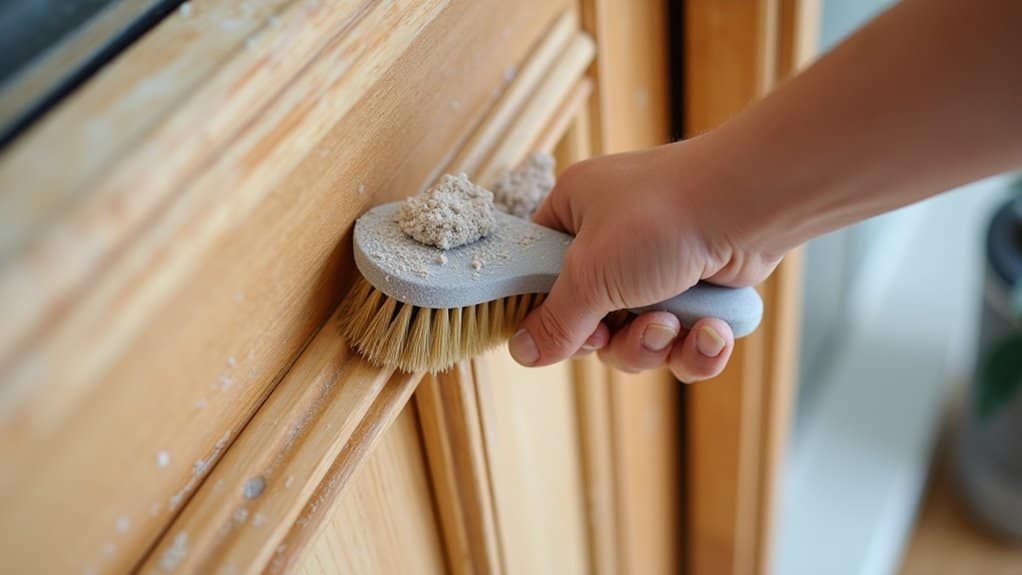
Sand the Surface for Better Adhesion
You’ll sand your door frame to establish paint adhesion by roughening the surface, which allows coatings to grip effectively and prevents peeling or flaking over time. Select 120-grit sandpaper for initial work on old paint and gloss, then progress to 180, 220 grit for smoothing between coats and after repairs. Apply even pressure using a sanding block to maintain consistent results across flat and profiled sections without gouging the substrate. After sanding, wash the frame with sugar-soap or mild detergent and allow it to dry thoroughly before applying any primer or paint coats. Wipe down the frame with a damp cloth to remove any remaining dust particles that could interfere with paint adhesion. For exterior door frames exposed to weather, use a high-quality oil primer like Zinsser Coverstain to ensure superior adhesion and protection against moisture infiltration.
Why Sanding Matters
When you’re preparing a door frame for painting, sanding isn’t optional, it’s the foundation that determines whether your finish’ll last years or peel away within months. Sanding creates the micro-textured substrate necessary for improved paint application and uniform surface texture, enabling primers and paints to bond mechanically rather than merely sitting atop old finishes.
This process delivers three critical outcomes:
- Removes contaminants, dust, grease, and oxidation that compromise adhesion
- Eliminates surface irregularities, old paint, chipped areas, and rough edges that cause visible flaws
- Enhances interlayer bonding, each coat adheres more effectively to the prepared substrate
Without proper sanding, even premium paint fails prematurely. The micro-texture you create acts as an anchor, preventing moisture infiltration and weathering that degrades unprotected wood or metal underneath. Fine-grit sandpaper, typically around 220-grit, is particularly effective for smoothing the surface between coats and ensuring optimal adhesion. For optimal results, combine hand sanding and electric sanding to achieve both efficiency on flat areas and superior finishing detail work. Following a progression from 80 grit to 320 grit ensures you remove heavy finishes first, then progressively refine the surface for a paint-ready texture that maximizes adhesion and durability.
Choosing the Right Grit
Selecting the appropriate sandpaper grit isn’t arbitrary, it’s a methodical progression that matches your door frame’s current condition and desired finish quality. Start with coarse grits like 80 or 60 for heavy paint removal, then progress through medium grits (120, 150) to smooth surface imperfections. Right grit selection prevents unnecessary time investment while ensuring proper preparation. Your progressive grit application determines adhesion quality and final appearance. For standard finishes, advance to 220-grit for paint-ready texture. If you’re applying gloss or semi-gloss finishes, incorporate 320-grit for enhanced smoothness. Skip no more than one grit level between applications, and always vacuum between steps to assess surface conditions. Remember to sand in the direction of the grain to prevent a streaky finish and achieve optimal results. This methodical approach guarantees ideal primer bonding and superior long-term weather resistance.
Technique for Even Results
Proper sanding technique directly determines whether your primer and paint’ll adhere uniformly across the door frame’s entire surface. Maintain uniform sanding pressure by employing a sanding block, which guarantees flatness and prevents uneven material removal. Execute linear, with-the-grain motions using light, continuous strokes with slight overlapping passes for consistent paint application.
Address these critical areas systematically:
- Sand filled or repaired sections flush with surrounding surfaces to eliminate ridges and bumps
- Inspect under adequate lighting post-sanding to identify missed spots or rough patches
- Wipe down the entire frame with a tack cloth to remove all sanding dust before priming
This methodical approach eliminates surface inconsistencies that’d otherwise compromise adhesion and create visible defects beneath your finish coats. For optimal weather resistance, use fine sandpaper to smooth out any remaining rough sections and ensure the surface is properly prepared for primer application.
Fill Cracks and Imperfections
Before you can achieve a smooth, professional finish on your door frame, you’ll need to properly prepare the surface by removing loose paint, old caulk, and debris from all cracks using a blunt tool or scraper. Use a Stanley knife to cut away jagged edges, then sand surrounding areas to feather changes. Vacuum and wipe the frame clean, ensuring it’s completely dry.
For filler selection, choose two-pack epoxy fillers for exterior frames, they provide superior weather resistance. Use decorator’s caulk for small joints requiring flexibility. Apply wood primer to raw wood before filling. Once the primer has dried, sand down rough surfaces with appropriate grit sandpaper to ensure optimal adhesion of your filler materials.
Your application techniques should involve mixing two-pack fillers according to manufacturer ratios immediately before use. Press filler deep into cracks with a flexible knife rather than skimming surfaces. Overfill slightly to compensate for shrinkage, then sand flush once fully cured.
Remove and Protect Hardware
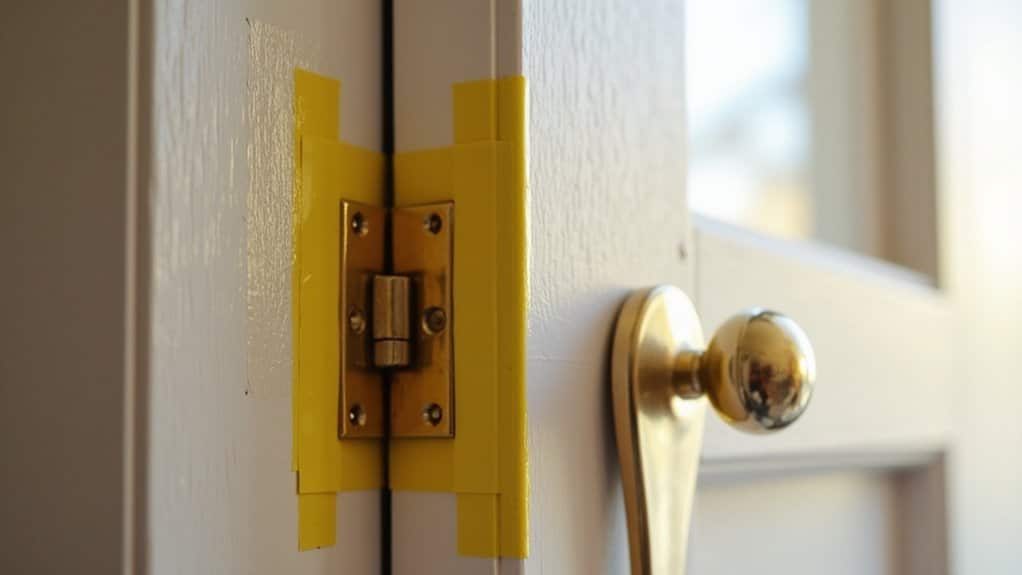
Once you’ve filled and sanded your door frame to a smooth finish, you’ll need to address the hardware that could obstruct your painting work. Removing strike plates, door knobs, and hinges prevents paint accumulation on functional components while enabling thorough frame coverage. Store all removed hardware in designated containers, organizing by location for efficient hardware reinstallation later.
For hardware you can’t remove, apply 70-100mm painter’s tape to all sides, creating complete protection against paint exposure. If existing hardware shows paint buildup, soak pieces in hot water with baking soda and laundry detergent to loosen layers, then gently scrub with soft bristle brushes. For stubborn paint accumulation, crockpot soaking offers a simple, hands-off method that can be more effective than manual scrubbing alone.
- Label storage containers by hardware type and location
- Extend tape coverage to irregular-shaped components
- Reserve specific areas for paint touch ups and reassembly
Apply Painter’s Tape and Drop Cloths
With your hardware secured and surfaces prepped, you’ll now mask and protect the work area to achieve clean paint lines and prevent accidental splatter. Select blue painter’s tape for sun-exposed areas or white tape for shaded sides, using 70, 100 mm widths for ideal coverage. Apply tape carefully along the door frame perimeter, trim edges, and hinges, smoothing firmly to prevent bleed-through. Overlap tape at corners for total coverage.
Next, secure drop cloths across the entire floor space, using tape or weights to prevent shifting. Layer waterproof or plastic-backed materials for moisture protection on exterior projects. Attach plastic sheeting behind your taped edges for inclusive masking against overspray. Familiarity with tools and materials is important for efficient application and achieving sharp results. This methodical approach minimizes tape residue while ensuring sharp, professional results when you begin painting.
Prime the Frame With Quality Primer
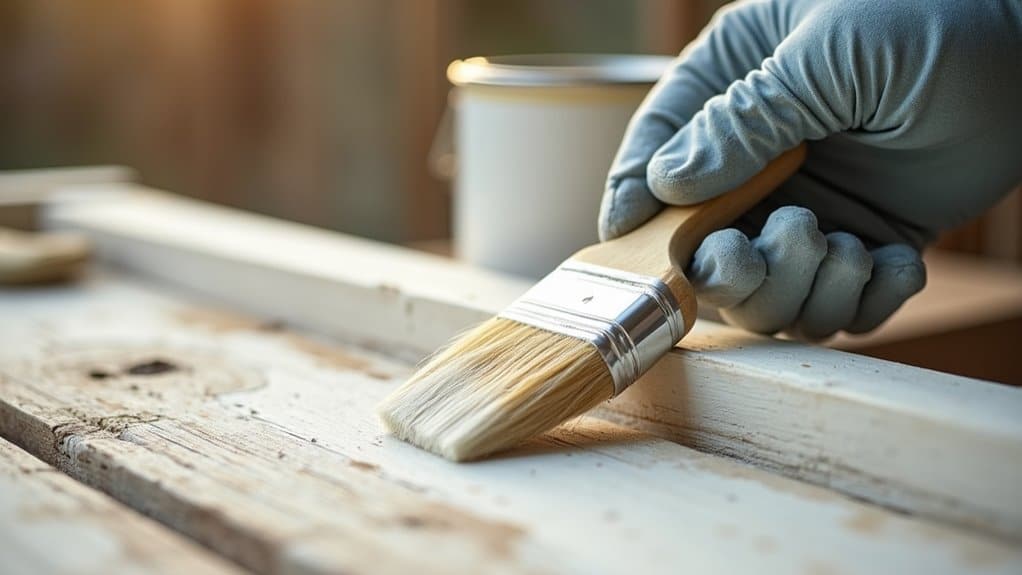
After you’ve taped and protected your work area, priming becomes essential for sealing bare wood and guaranteeing preferred paint adhesion. Selecting appropriate types of primer depends on your door frame material and environmental conditions. Oil-based primers excel at blocking stains for darker colors, while water-based primers offer superior weather resistance. Latex primers work effectively on fiberglass and metal, and epoxy primers provide maximum durability for heavy-use doors.
Implement these primer application techniques:
- Apply thin, even coats using small brushes or rollers on bare wood surfaces
- Prime the frame initially, then address door details systematically
- Allow complete drying per manufacturer instructions before topcoat application
Never prime weather stripping where the door closes. Multiple coats on porous wood guarantee adequate sealing and protection against moisture penetration, preventing future paint peeling and wood warping.
Select the Right Exterior Paint
Because your door frame’s longevity depends on choosing paint formulated for outdoor conditions, you’ll need to evaluate several exterior-grade options that match your specific material and climate.
Regard paint performance characteristics like UV resistance, water repellency, and flexibility. Acrylic latex suits wood, metal, and fiberglass frames with solid durability. Elastomeric paints excel where movement occurs, expanding up to 600% to address hairline cracks. Oil-based formulations resist moisture exceptionally well on wood and steel but require proper priming over latex.
Assess environmental factors to ponder: climate intensity, humidity levels, and sun exposure. In high-humidity regions, prioritize anti-fungal properties. Direct sunlight demands UV-blocking technology. Select semi-gloss sheens for superior water repellency and easier maintenance. Match your primer type to guarantee adhesion and long-term protection.
Apply Multiple Thin Coats
You’ll build superior weather resistance and durability by applying multiple thin coats rather than a single heavy layer, which prevents moisture entrapment and paint failure. You must allow each coat to dry fully, typically 30, 45 minutes for latex paints, and maintain the manufacturer-specified mil thickness to guarantee proper adhesion and avoid voiding your warranty. You’ll achieve uniform color coverage and a smooth finish by sanding lightly between coats with fine-grit sandpaper, which promotes intercoat bonding and fills missed spots from the base coat.
Why Thin Coats Matter
While it’s tempting to apply one thick coat and finish the job quickly, multiple thin coats deliver superior results across weatherproofing, appearance, and longevity.
When you layer thin coats, you build film thickness methodically, typically reaching the manufacturer’s target of 3, 4 mils DFT. This approach seals surface pores more effectively than a single heavy application, preventing water intrusion and wood degradation.
Key benefits include:
- Reduced defects, thin coats minimize cracking, peeling, and fading while eliminating drips and sags
- Superior adhesion, layered applications penetrate textures and bond tightly between substrate and finish
- Extended lifespan, properly applied coats extend coating life by 3, 5 years, lowering maintenance costs
The methodical approach requires patience but guarantees a flawless, durable finish that withstands weathering and UV exposure far longer than thick, brittle single coats.
Proper Drying Between Coats
The discipline of applying thin coats only pays dividends if you’re willing to let each layer cure properly, rushing between coats undermines the very advantages you’ve worked to achieve. You’ll need to respect proper temperature requirements between 50, 85°F for latex paints, allowing 4, 6 hours before recoating wood door frames. Maintain ideal humidity levels at 50% or lower; higher moisture extends drying time considerably. Before applying your next coat, test the surface by gently touching an inconspicuous area, it should feel dry and non-tacky. Light sanding between coats removes imperfections and promotes adhesion. Skip this patience, and you’ll risk blistering, peeling, cracking, and compromised weather resistance. Always reference the manufacturer’s datasheet for your specific product’s requirements.
Achieving Even Coverage Results
Multiple thin coats are essential for achieving professional-quality results on door frames, they’ll give you even color coverage, prevent patchiness, and create a surface that’s far more durable than what you’d get from a single thick application.
- Thin layers minimize runs, sags, and drips while enabling better bonding to surfaces and previous coats
- High-density foam rollers applied in wood-grain direction deliver smooth, uniform coverage with minimal texture
- Maintaining wet edges between sections prevents overlaps and guarantees even pigment distribution across all areas
Apply your preliminary coat as base coverage, then subsequent coats for opacity and uniform finish. Two coats are standard; three coats suit dramatic color changes. Avoid overworking paint after 2, 3 minutes to prevent texture marks. This methodical layering approach yields the durable, weather-resistant protection your door frame requires.
Remove Masking and Inspect the Finish
After the paint’s surface has dried to the touch, you’re ready to carefully remove the masking tape, the critical final step that reveals your work’s true quality. Pull the tape back on itself at a 45-degree angle to minimize lifting fresh paint. Use a utility knife to score along edges where paint has formed a film, ensuring clean lines.
Next, inspect all junctures for crispness and uniformity. Identify any paint seepage under the tape and note areas requiring touch-ups. Check corners and detailed trim thoroughly.
Assess paint cure by lightly pressing your fingernail in an inconspicuous spot, no dent should appear. Pass a clean, dry cloth over surfaces to confirm paint isn’t tacky. Use fine-grit sanding to feather imperfections for a professional finish.
Maintain Your Painted Door Frame
Your freshly painted door frame isn’t a finished project, it’s the beginning of an ongoing maintenance routine that’ll preserve your work’s quality and protect your home from the elements. Establish a systematic approach to guarantee your investment.
Implement these essential practices:
- Clean monthly with soft microfiber cloths and gentle, non-abrasive cleaners to prevent grime buildup that degrades paint integrity.
- Conduct routine inspection twice yearly, examining for cracks, blistering, peeling paint, and wood rot, particularly after heavy rains.
- Monitor caulk maintenance by inspecting sealant lines for breaks or gaps, resealing damaged areas promptly to prevent water intrusion.
Address minor damage immediately through touch-up painting and hardware tightening. Refresh your paint every 3, 5 years, depending on wear indicators. This methodical maintenance strategy certifies lasting weather resistance and structural integrity.
Frequently Asked Questions
How Long Should I Wait Between Applying Primer and the First Paint Coat?
You’ll typically wait 1, 2 hours for water-based primer or 8, 24 hours for oil-based primer before applying your inaugural paint coat. However, you shouldn’t hasten this stage, prolong your wait time in humid or cool conditions. Before advancing, you’ll lightly sand the dried primer and remove all dust as part of proper surface preparation. This application technique guarantees ideal paint adherence and prevents peeling or wrinkling that jeopardizes your door frame’s weather resistance and longevity.
What Temperature and Humidity Conditions Are Ideal for Painting Exterior Door Frames?
You’ll achieve favorable results when you paint within the ideal temperature range of 60°F to 75°F. Simultaneously, maintain suitable humidity levels between 40% and 70%. You should guarantee temperatures don’t drop below 50°F or exceed 85°F, as both extremes compromise paint adhesion and drying. You must also keep surfaces at least 5°F above the dew point, preventing condensation that undermines bonding. You’ll want calm, dry conditions without rain forecast within 24 hours.
Can I Paint Over Existing Paint Without Sanding or Priming First?
You can paint over existing paint without sanding or priming only if the surface is fully intact, matte, and well-bonded. However, you’ll greatly/substantially compromise durability and weather resistance. For latex paint preparation, you’ll need thorough cleaning and light sanding at minimum. If you’re switching from oil-based primers or glossy finishes, skipping prep voids warranties and risks peeling. Professional standards recommend at least surface dulling and cleaning for lasting results.
Should I Paint the Weatherstripping, or Should I Mask It Completely?
You should mask your weatherstripping completely, don’t paint it. Use painter’s tape to cover all strips before priming and painting. If you’re tempted to paint weatherstripping carefully and avoid over painting edges, resist that urge. Paint hardens rubber or vinyl, compromising flexibility and sealing performance. It’ll crack, lose elasticity, and fail prematurely. Masking takes minutes but preserves your weatherstripping’s functionality for years, ensuring ideal energy efficiency and weather protection.
How Often Should I Repaint My Door Frame to Maintain Weather Resistance?
Your repainting frequency depends on frame material and exposure. You’ll need to repaint wooden frames every 2, 3 years, metal frames every 5 years, and fiberglass frames every 4, 5 years. Coastal climates demand annual inspections. Sheltered locations extend intervals to 3, 5 years. Proper paint application, including thorough surface prep and high-quality exterior coatings, maximizes protection. Conduct annual inspections and perform spot touch-ups between full repaints to maintain weather resistance effectively.