
Assess the Extent of Damage to Your Door Frame
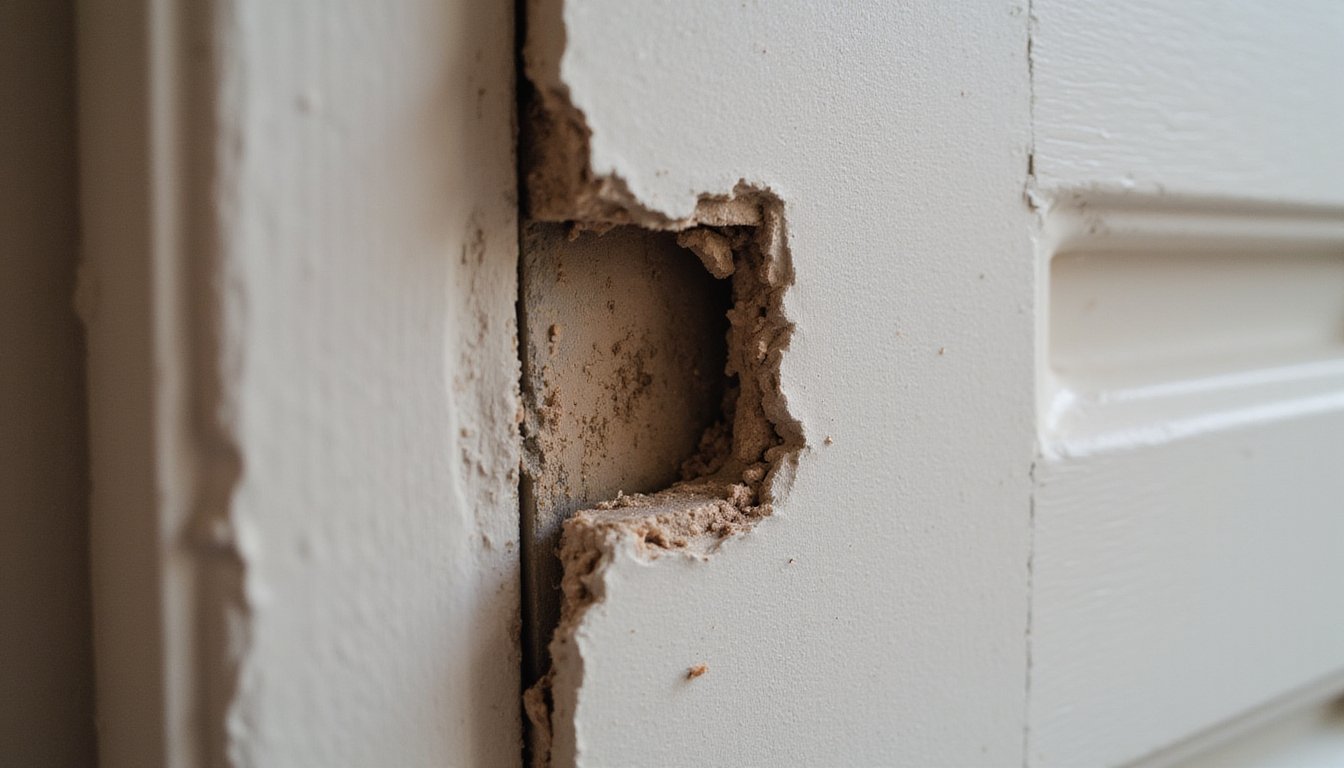
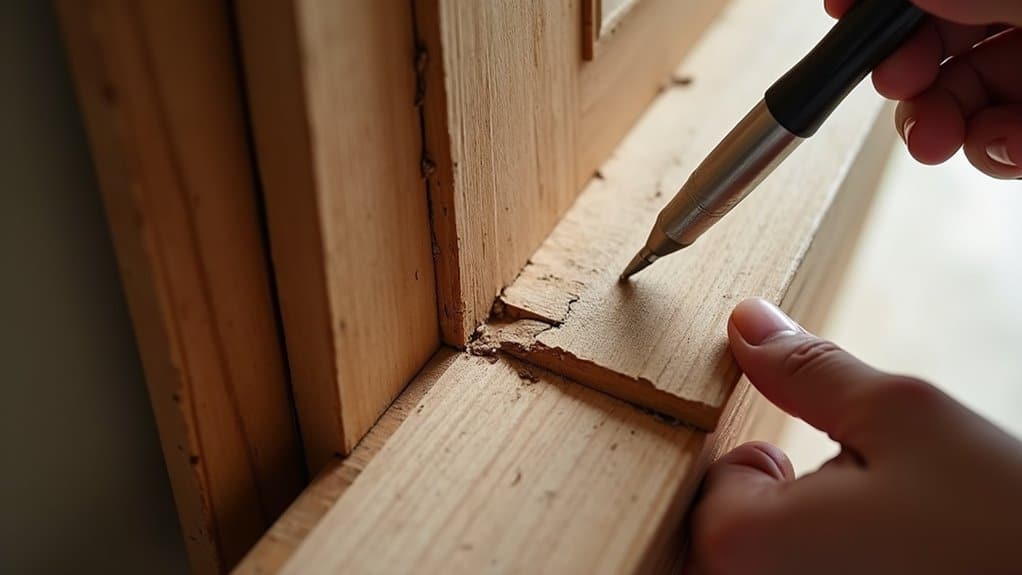
Before you can effectively repair a damaged door frame, you’ll need to systematically evaluate what you’re working with. Start by examining wood conditions through tactile and visual inspection. Push gently on the frame to detect soft spots indicating rot or deterioration. Look for visible cracks, splintering, or discoloration that suggest water damage. Inspect frame stability by checking for movement or creaking when pressure is applied. Tap the wood to identify hollow sections revealing pest damage or internal decay. Document crack measurements, including width and depth. Assess whether damage is localized or extensive across the structure. Determine if you detect musty odors, mold growth, or termite frass. Check for signs of moisture damage, as this can indicate a more serious issue that may require replacing parts of the frame. Gather your measurements and documentation in a detailed repair record to reference throughout the restoration process. Regular inspection is necessary to identify weaknesses that may compromise your home’s security and structural integrity. This thorough evaluation guides your repair strategy and clarifies whether professional intervention or replacement becomes necessary.
Gather the Right Tools and Materials for Repair
Once you’ve identified the damage affecting your door frame, you’ll need to assemble the proper tools and materials before starting repairs. Gather essential hand tools: hammer, screwdriver set, chisel, putty knife, and measuring tape. For efficient work, consider power tools like a drill, circular saw, and sander.
Purchase replacement wood matching your frame dimensions and replacement wood species exactly. Stock wood filler, two-part epoxy, heavy-duty screws, and finishing nails. Include wood hardener to reinforce soft areas and prevent future moisture damage.
Equip yourself with safety gear: work gloves, safety goggles, and dust mask. Bring a level, flashlight, and square to guarantee accurate repairs. For enhanced security against forced entry, consider metal reinforcement strips to significantly strengthen the door frame beyond standard repair methods. Finally, obtain sandpaper, paint or stain, caulk, and construction adhesive to complete your restoration suitably. Don’t forget to stock primer and paint as they seal the repaired frame and protect it from moisture exposure that causes wood rot.
Remove Damaged Sections Carefully and Thoroughly
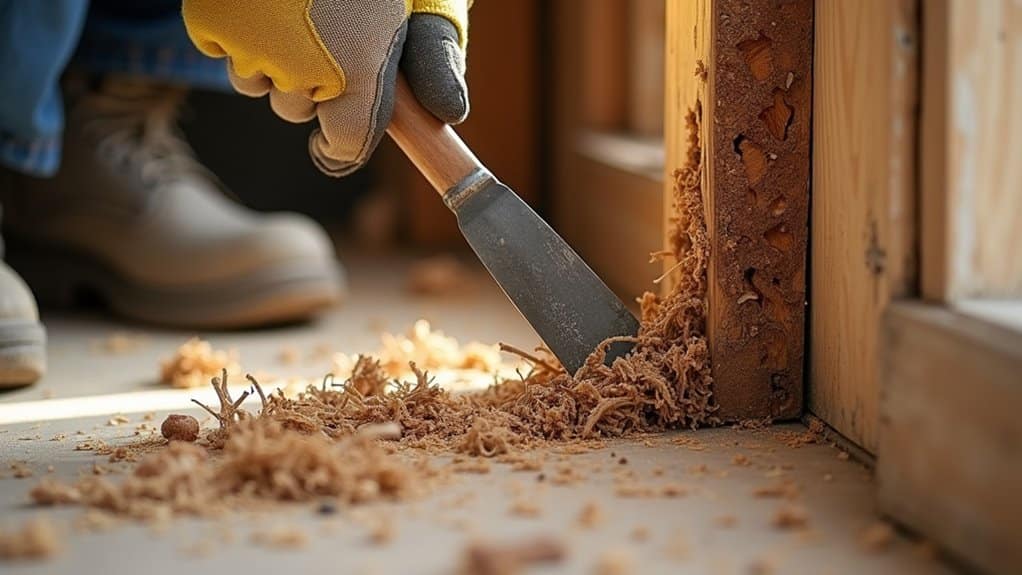
You’ll need to assess the damage thoroughly before making any cuts or extractions. Inspect the frame for rot, cracks, or splits, measuring affected areas precisely to guide your work. Once you’ve identified weak points, use saws, chisels, or utility knives to remove severely compromised wood with precision, avoiding extension into healthy sections. For metal frames, abrade and clean away corrosion completely. Remove all deteriorated material, splintered wood, mold, and rust, entirely for long-term structural integrity. After extraction, sand edges smooth and create uniform pockets for patches using routing techniques. Check for loose or detached sections of the frame to ensure complete assessment before proceeding. Wear safety goggles and gloves to protect against splinters and debris while removing damaged parts. Addressing these issues early prevents more significant problems over time. Minimize collateral damage by working carefully around non-damaged zones. Ultimately, address mitigating disposal risks by following safety and waste guidelines when discarding removed sections.
Apply Repair and Reinforcement Techniques Properly
How can you transform a weakened door frame into a fortified barrier? You’ll reinforce vulnerable sections by installing jamb reinforcement plates with 2½, 3 inch screws anchored into wall studs. Replace compromised wood with matching material and use epoxy resin for split areas. Upgrade hinges with extra-long screws (4″ for frame, 2″ for door) that penetrate structural framing deeply. Install high-security strike plates and deadbolt shrouds to prevent splitting during impact attempts. Guarantee at least one long screw reaches the trimmer stud in each lock hardware hole. Consider substituting hinge screws with drywall screws for added security when reinforcing the hinge side. Remove the existing strike plate before installation to assess any hollow areas behind the jamb that may require additional reinforcement or filler material. Monitor repair effectiveness through regular inspections for signs of wear, damage, or potential issues, focusing on hinges, locks, and corners. Apply wood hardener to decay zones and use corrosion-resistant fasteners. Test lock operation after completion to verify reinforcement hasn’t compromised functionality.
Finish, Protect, and Maintain Your Repaired Frame
With your door frame now structurally sound and reinforced, proper finishing work protects your repairs and extends the frame’s lifespan. To optimize the finishing process, start by sanding with coarse then fine-grit sandpaper, creating a smooth surface that blends repairs seamlessly. Fill nail holes with durable filler and inspect for touch-ups before priming.
Apply oil-based primer to block stains and improve paint adhesion, followed by exterior-grade paint in matching colors. Allow adequate drying time between coats. Seal joints and seams with waterproof caulk to prevent water infiltration and rot.
Inspect for long-term functionality by conducting periodic visual checks for cracking, peeling, or swelling. Clean surfaces regularly with mild detergent and touch up scratches promptly. Schedule annual resealing in high-exposure areas to maintain protective integrity.
Frequently Asked Questions
How Long Does Epoxy Resin Take to Cure Before Sanding and Painting the Repair?
You’ll typically wait 24-72 hours after your resin application before sanding. For fast-hardening epoxies, you can begin after 1-2 hours if the manufacturer approves. However, don’t paint until you’ve achieved full cure, at least 24-72 hours minimum. You should sand the cured surface thoroughly and remove all dust before priming and painting. Following manufacturer guidelines guarantees ideal adhesion and durability for your door frame repair.
Can I Repair a Door Frame if the Damage Affects Multiple Sides or Corners?
Yes, you can repair multi-sided corner damage using multi-faceted repair approaches. You’ll need to assess each affected area’s severity since damage affecting multiple sides compromises affected structural integrity. Remove severely damaged sections, install custom-cut replacement pieces, and reinforce joints with high-strength adhesives and metal brackets. You’ll confirm proper alignment with shims, then sand and finish surfaces. If extensive rot’s involved, consult professionals to certify code compliance and safety restoration.
What Causes Door Frames to Warp, and How Can I Prevent It in the Future?
You’ll find that moisture fluctuations and temperature swings cause wood expansion and contraction, leading to warping. Improper installation, using undried timber or incomplete finishing, accelerates this damage. You can prevent warping by maintaining consistent humidity (40, 60%), applying even finishes to all surfaces, installing proper weather seals, and selecting kiln-dried materials. You’ll also need regular inspections to catch moisture penetration early and repair gaps promptly.
Is It Better to Patch a Damaged Frame or Replace It Entirely?
You’ll find repair feasibility depends on damage severity and material selection. For minor surface damage, patching proves cost-effective and preserves aesthetics. However, you’ll need replacement if you’re dealing with structural compromise, severe warping, or extensive rot. Assess whether the frame’s core remains sound, if it’s structurally compromised, patching won’t restore adequate safety. Professional evaluation helps you determine whether your material type supports viable repair or necessitates complete replacement.
How Often Should I Inspect My Door Frame for Signs of Damage or Deterioration?
You should conduct regular visual inspections of your door frames at least annually to catch early signs of damage. For high-traffic areas or commercial settings, you’ll benefit from periodic professional assessments twice yearly. If you’ve noticed moisture exposure, pest activity, or previous repairs, increase your inspection frequency accordingly. After severe weather or impacts, inspect immediately. This methodical approach prevents costly structural failures and maintains your door frame’s security and safety integrity.