


To fix your sagging aluminum storm door, you'll need to systematically assess the frame alignment, check hardware, and make precise adjustments. Start by inspecting the hinges and frame for misalignment, then gather essential tools like a drill, screwdrivers, and level. Tighten all loose hardware components, adjust the hinges using shims if needed, and realign the strike plate for proper latching. For best results, following a detailed step-by-step repair process guarantees long-lasting door performance.
Assess the Door's Problem Areas
Proper diagnosis is essential before fixing a sagging aluminum storm door. Begin your door inspection by checking if the door is rubbing against the frame or leaving gaps when closed. Open and close the door several times, observing its movement pattern and listening for unusual sounds.
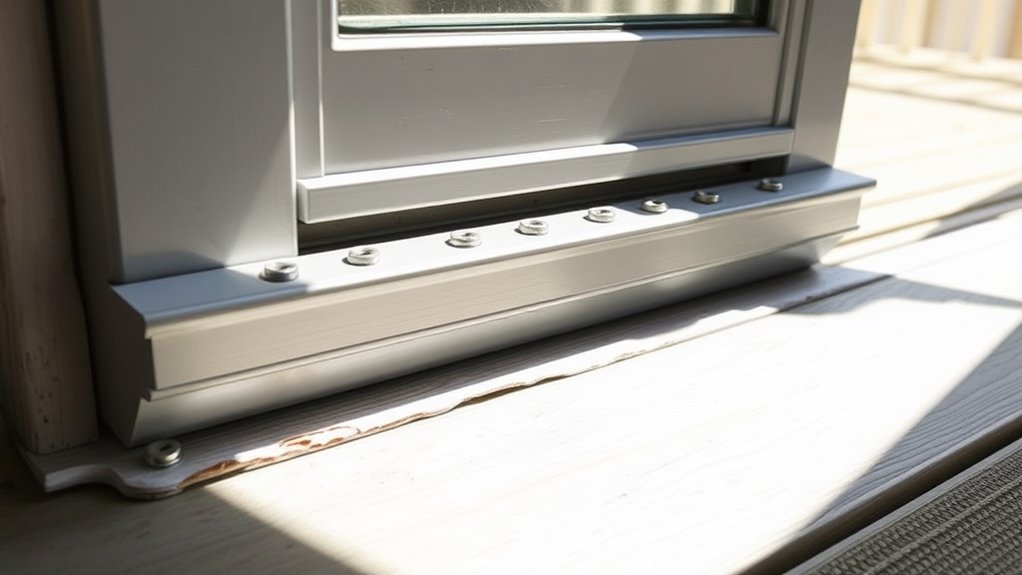
Common sagging causes include loose hinges, worn sweep, or frame misalignment. Examine the hinge screws for signs of loosening or stripping. Check if the door's corner opposite the hinges has dropped lower than the frame. Test the sweep at the bottom of the door for wear or damage. Inspect the frame itself, using a level to verify it's still square. You'll also want to look for any bent components or structural deformation in the door's aluminum body that might contribute to the sagging.
Gather Required Tools and Materials
A successful storm door repair starts with assembling the right tools and materials. For basic safety precautions, you'll need work gloves, safety glasses, and a dust mask. Your tool selection should include a power drill with bits, Phillips and flathead screwdrivers, an adjustable wrench, pliers, and a level.
Essential materials include replacement hinges, screws that match your door frame's specifications, shims of different thicknesses, and a tube of silicone caulk. If you're addressing severe sagging, you'll also want to have aluminum spacers and weatherstripping on hand. Keep a small container nearby for organizing removed hardware. For stubborn screws or rusted parts, have penetrating oil ready. Don't forget to gather a sturdy stepladder and door props to support the door during repairs.
Tighten All Door Hardware
With your tools ready, start by examining all hardware components on your storm door. Check each screw, hinge, and fastener for signs of looseness. As part of your door maintenance routine, tighten every connection point systematically.
| Hardware Part | Action Required |
|---|---|
| Hinges | Tighten all screws firmly |
| Handle Set | Check alignment, secure mounting |
| Closer Unit | Adjust tension, tighten brackets |
| Strike Plate | Verify position, tighten screws |
If you find stripped screws during inspection, hardware replacement will be necessary. Replace these with slightly larger screws of the same type. Don't overtighten, as this can strip the holes or damage the aluminum frame. Test the door's movement after securing each component to guarantee smooth operation and proper alignment.
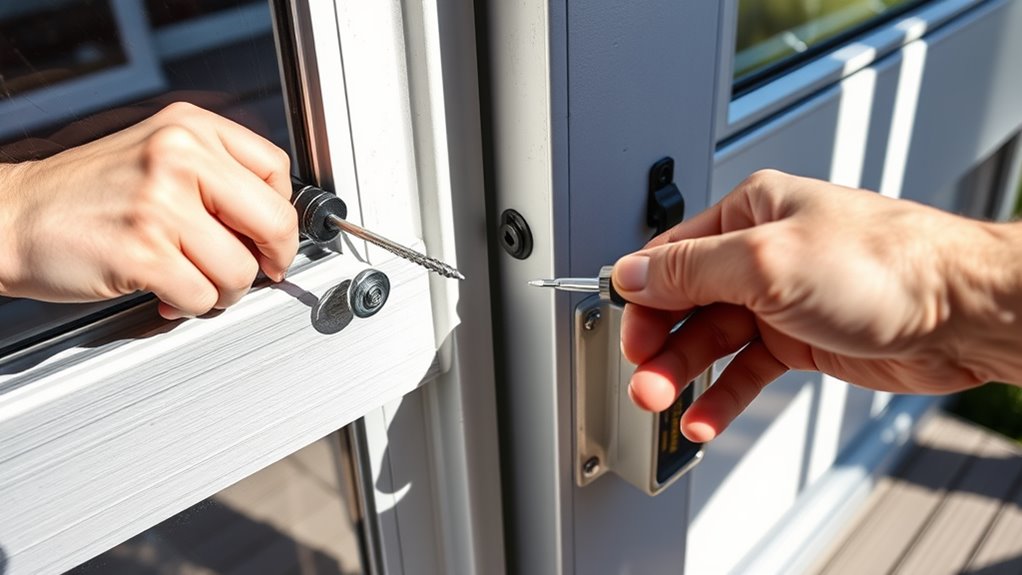
Adjust the Door's Hinges
Door hinges require precise adjustment to correct sagging and restore proper alignment. You'll need to carefully inspect each hinge, looking for signs of looseness or misalignment that could be causing your storm door to sag. Proper hinge adjustment involves both vertical and horizontal calibration to guarantee smooth operation.
Precise hinge adjustment is essential for fixing sagging doors and ensuring smooth operation through proper vertical and horizontal calibration.
For effective door alignment, follow these steps:
- Loosen the hinge screws slightly on both the door frame and door edge, allowing for minor adjustments without removing the door completely
- Place a level against the door's edge while making incremental adjustments to each hinge, starting from the top
- Test the door's swing after each adjustment, then tighten all screws firmly once you've achieved proper alignment
If the hinges still don't provide adequate support after adjustment, you may need to install hinge shims.
Align the Strike Plate and Latch
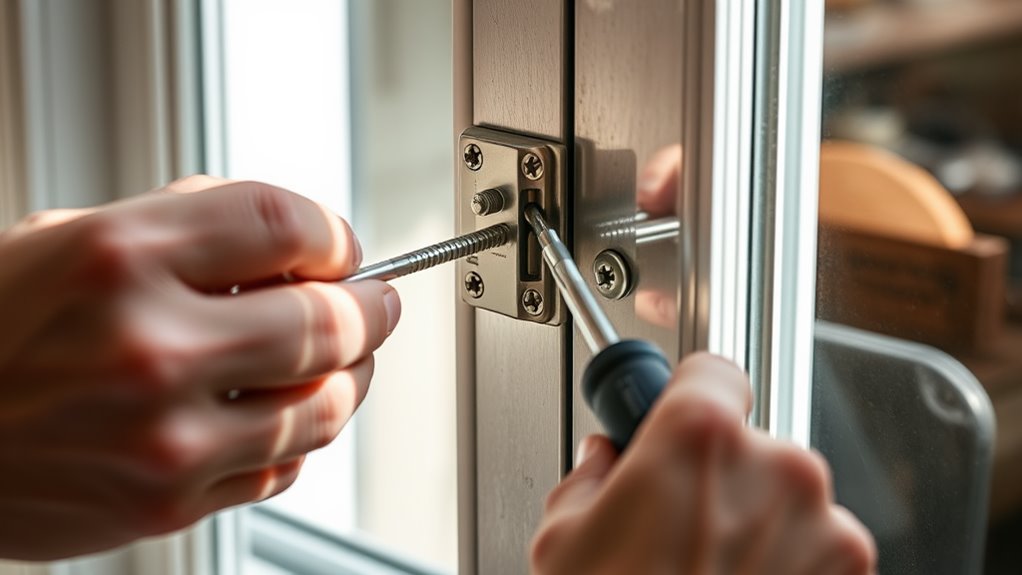
Once you've adjusted the hinges, proper latch alignment becomes the next vital step. Check if the latch meets the strike plate squarely when the door closes. If it doesn't, you'll need to perform a strike plate adjustment to guarantee secure closing.
Loosen the strike plate screws and shift its position until the latch engages smoothly. Test the door's operation several times to confirm proper latch alignment. If the strike plate needs more significant repositioning, fill any exposed screw holes with weatherproof wood filler before drilling new ones.
For best results, verify the gap between the door and frame remains consistent from top to bottom. You may need to adjust both the strike plate and latch mechanism until they work together seamlessly, providing a tight seal when closed.
Check and Adjust the Door Closer
Inspect the hydraulic door closer mechanism mounted at the top of your storm door to guarantee it's functioning properly. Different door closer types include pneumatic, spring-loaded, and hydraulic models, each requiring specific maintenance approaches. If your closer isn't working correctly, you'll need to examine the closer installation for proper positioning and adjustment.
Follow these steps to adjust your door closer:
- Check the mounting bracket's alignment and tighten any loose screws connecting the closer to both the door and frame
- Adjust the closer's tension by turning the adjustment screws – clockwise increases closing speed, counterclockwise decreases it
- Test the door's closing action, ensuring it closes smoothly without slamming and remains partially open when you want it to
Test Door Operation and Make Final Tweaks
After completing the initial adjustments, you'll need to thoroughly test the storm door's operation to confirm all components work together properly. Open and close the door multiple times, checking for smooth movement and proper latching. Listen for any squeaking or grinding sounds that might indicate remaining alignment issues.
Test door functionality in different weather conditions, including windy days, to verify the door maintains its position. If you notice any binding or resistance, make final adjustments to the hinges, closer, or strike plate as needed. Check that weatherstripping makes proper contact around the frame's perimeter. Adjust the sweep at the door's bottom if there's still a gap. Once you've achieved smooth operation, tighten all hardware securely and confirm the door remains level.
Frequently Asked Questions
How Often Should I Perform Maintenance on My Aluminum Storm Door?
You'll want to perform seasonal inspections on your aluminum storm door at least twice a year – typically in spring and fall. Create a maintenance checklist that includes checking weatherstripping, lubricating hinges and closers, tightening screws, and cleaning tracks. Don't forget to inspect the sweep, screen, and glass components during these checks. Regular maintenance prevents costly repairs and extends your door's lifespan by catching issues early.
Can I Replace Individual Door Parts Instead of the Entire Door?
Yes, you can replace individual storm door parts, but you'll need to check door part compatibility initially. Most manufacturers offer replacement components like handles, closers, hinges, and sweeps. It's crucial to evaluate repair costs versus full door replacement – sometimes individual parts can cost nearly as much as a new door. You'll want to identify your door's make and model to guarantee you're ordering the correct replacement components.
What's the Average Lifespan of an Aluminum Storm Door?
Your aluminum storm door's typical lifespan ranges from 20 to 40 years, depending on maintenance and environmental conditions. You'll get maximum longevity if you're in a mild climate and perform regular upkeep. Heavy use, coastal air, and extreme weather can reduce your storm door's lifespan to the lower end of this range. With proper care, including periodic lubrication and weatherstripping replacement, you can expect your door to serve well for decades.
Should I Use Silicone Spray or Oil-Based Lubricant for Door Maintenance?
You'll want to choose silicone spray over oil-based lubricants for door maintenance. Silicone advantages include its non-sticky finish, resistance to temperature changes, and prevention of dust accumulation. Lubricant differences are significant: oil-based products attract dirt and can become gummy over time, while silicone stays clean and won't freeze in cold weather. Silicone also won't stain your door and provides longer-lasting protection against rust and corrosion.
How Much Does Professional Storm Door Repair Typically Cost?
Professional storm door repair costs typically range from $150 to $400, depending on your location and the extent of damage. You'll pay more if you need complete storm door installation, which can run between $300 and $800. Basic repair techniques like hinge replacement or weatherstripping might cost less, around $75-$150. If you're dealing with structural issues or specialty parts, you could face higher charges, especially for custom storm doors.