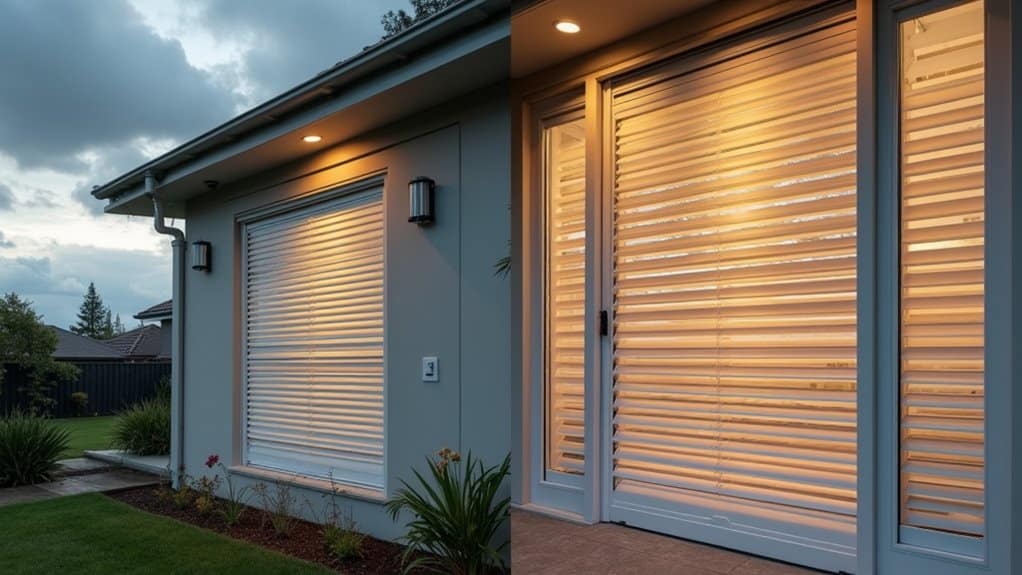

To install a window correctly, you'll need essential tools including a pry bar, level, tape measure, and power drill, plus safety equipment like gloves and glasses. Start by taking precise measurements of the opening's width, height, and depth, subtracting 1/4 inch for adjustments. Remove the old window and clean the opening thoroughly, checking for damage. Position the new frame using shims, verify it's level and square, then secure mounting brackets at 12-inch intervals. Install the window with proper weatherstripping and exterior-grade caulk for a weathertight seal. These initial steps lay the groundwork for a professional-quality installation that will serve you for years to come.
Gathering Tools and Materials
A successful window installation begins with having the right tools and materials on hand. Your tool selection should include essential items like a pry bar, level, tape measure, utility knife, hammer, screwdrivers, and a power drill with various bits.
You'll also need safety equipment including work gloves, safety glasses, and a dust mask.
For material types, start with the window unit itself, confirming it's the correct size and style for your opening. You'll need exterior-grade silicone caulk, expanding foam insulation, and shims to guarantee proper alignment.
Include flashing tape, drip cap, and exterior trim materials appropriate for your home's exterior finish. Don't forget fasteners: gather galvanized screws of various lengths, finishing nails, and any specialty anchors your specific installation might require.
Keep your workspace organized by arranging materials in the order you'll use them. You'll want to verify that your window unit includes all manufacturer-supplied components like installation brackets, screens, and hardware before beginning.
Double-check local building codes to confirm your materials meet requirements for weather resistance and energy efficiency.
Taking Accurate Window Measurements
Taking precise measurements stands as the most critical step before purchasing a replacement window. You'll need to measure each window opening in three distinct locations to account for any variations in the frame. Different window types require specific measurement techniques to guarantee proper fit and functionality.
| Measurement Point | What to Measure |
|---|---|
| Width | Top, middle, bottom |
| Height | Left, center, right |
| Depth | Frame thickness, jamb depth |
| Square Check | Diagonal corners both ways |
When measuring, always use the smallest width and height measurements to guarantee your new window will fit. You'll want to subtract 1/4 inch from both width and height measurements to allow for proper adjustment during installation. For accurate results, measure from the inside of the window jamb to jamb, not including the trim or casing.
Don't forget to verify the squareness of your opening by measuring diagonally from corner to corner in both directions. If these measurements differ by more than 1/4 inch, you'll need to account for this discrepancy when ordering your replacement window. Record all measurements twice to eliminate potential errors.
Removing the Old Window
Once you've confirmed your measurements, proper removal of the existing window begins with gathering essential tools and safety equipment.
You'll need safety glasses, work gloves, a pry bar, utility knife, hammer, and protective drop cloths. Before starting window removal techniques, verify you've cleared the work area both inside and outside the house.
Start by removing interior trim pieces carefully with your pry bar, preserving them if you plan to reuse them.
Score along the edges of any caulk or paint with your utility knife to prevent wall damage. Next, remove the window stops and parting beads that hold the sash in place. If you're dealing with old windows, watch for lead paint and take appropriate safety precautions.
Remove the sashes and examine the frame for rot or damage. If the frame is sound, you can proceed with a replacement window.
If not, you'll need to remove the entire frame. Cut through any nails securing the frame using a reciprocating saw, then carefully pry the frame loose.
Clean the opening thoroughly, removing any debris, old caulk, or damaged wood to prepare for the new installation.
Preparing the Window Opening
After removing the old window, you'll need to clear away any remaining caulk, nails, and debris from the frame and sill.
You'll want to thoroughly inspect and clean the rough opening to guarantee no hidden damage or rot exists.
Using a tape measure, take precise measurements of the height and width at multiple points to confirm the opening's dimensions match your new window specifications.
Clear Old Window Parts
Before installing a new window, you'll need to completely clear the existing window frame of old parts and debris. Start by removing the old sash weights, pulleys, and any interior stops or trim pieces. Use a pry bar and hammer, working carefully to avoid damaging the surrounding frame or wall surfaces.
Next, scrape away all old caulk, glazing compounds, and weatherstripping from the frame using a putty knife and wire brush. Pay special attention to corners where debris often accumulates. This thorough cleaning is essential for window maintenance and guarantees peak energy efficiency with your new installation.
Remove any protruding nails or screws, and sand down rough spots in the frame. Vacuum the entire opening to eliminate dust and loose particles. If you discover any rotted wood or water damage, repair these areas before proceeding.
Test the frame's structural integrity by pressing firmly on all sides. Finally, wipe down the entire frame with a clean, dry cloth to remove any remaining dust. Check that the opening is completely square and level. If metal components show signs of rust or corrosion, treat these areas with an appropriate rust converter before continuing with the installation.
Measure Opening Dimensions
Taking precise measurements stands as your next major task in the window installation process. You'll need several measurement tools including a tape measure, carpenter's square, and level to guarantee accuracy.
Start by measuring the width at three points: top, middle, and bottom of the opening. Record the smallest measurement, as this will determine your window size.
Next, measure the height at three points: left side, center, and right side of the opening. Again, use the smallest measurement for your calculations.
Check the opening's squareness by measuring diagonally from corner to corner in both directions – these measurements should match. If they don't, you'll need to account for this variance when selecting your window type.
Verify the opening's depth to ascertain it can accommodate your chosen window type. Most window types require a minimum depth of 3¼ inches.
Check for any obstructions like electrical wires or plumbing that might interfere with installation.
Finally, measure the exterior opening dimensions and compare them with interior measurements to confirm wall thickness and identify any inconsistencies that could affect installation.
Document all measurements carefully for reference when ordering your new window.
Installing the New Window Frame
You'll need to position and level the window frame using shims before any permanent attachment begins.
Next, fasten the pre-installed side mounting brackets to the rough opening, ensuring they're tight against the frame and wall structure.
Complete the initial frame setup by measuring diagonally from corner to corner to verify the frame maintains perfect square alignment before proceeding with additional installation steps.
Level the Frame First
Proper leveling of the window frame is the most critical step for guaranteeing ideal performance and longevity. Your frame leveling techniques must be precise, as even slight misalignments can lead to operational issues and water infiltration.
Using a 4-foot level, check both horizontal and vertical planes, and make adjustments until you've achieved perfect alignment in all directions.
When executing installation techniques, you'll need to verify measurements in multiple locations to guarantee consistent spacing. Place shims at strategic points to maintain proper positioning while you work. Don't rush this process – take time to make minor adjustments until everything aligns perfectly.
- Position your level across the sill, guaranteeing it reads exactly 0° for ideal drainage
- Check vertical jambs using a plumb bob or level, adjusting until they're perfectly straight
- Measure diagonally from corner to corner to confirm the frame is square
- Verify the frame isn't bowed or twisted by measuring the width at multiple points
Once you've achieved proper leveling, temporarily secure the frame with finishing nails through the jamb.
You'll want to avoid fully securing the frame until you've completed a final check of all measurements and operations.
Secure Side Mounting Brackets
Once the frame is level, mounting brackets must be secured to both jambs to provide lateral stability and proper anchoring. You'll need to select appropriate mounting bracket types based on your window's specifications – typically either L-brackets or flat mounting plates designed for your specific window model.
Position the first bracket 6 inches from the top of each jamb, and space additional brackets at 12-inch intervals down both sides. For proper side bracket installation, make certain you're drilling pilot holes at the marked locations using the correct bit size for your fasteners.
When securing brackets, maintain a consistent depth and avoid over-tightening, which could warp the frame. Check your window manufacturer's guidelines for specific bracket placement requirements, as some models may need additional support points.
You'll want to verify that each bracket sits flush against both the jamb and the rough opening. Install shims behind brackets where necessary to maintain proper spacing and prevent frame distortion.
Once all brackets are secured, test the window's operation to confirm the side attachments haven't affected the frame's levelness or functionality. The window should open and close smoothly without binding or resistance.
Check Frame Square Alignment
After positioning the window frame in the rough opening, measuring its square alignment becomes a critical step that guarantees peak functionality and weatherproofing.
You'll need to perform a thorough frame inspection using diagonal measurements and a carpenter's level to ascertain perfect alignment.
Start your alignment techniques by measuring diagonally from corner to corner in both directions. The measurements should be identical within 1/8 inch for proper square.
Next, use your level to check the frame's plumb on both sides and verify the header and sill are perfectly level. If you discover any discrepancies, you'll need to make adjustments using shims before proceeding with the installation.
- Measure diagonally from top-left to bottom-right corners, then top-right to bottom-left corners – they must match
- Place your level vertically against both jambs to confirm they're plumb
- Check the head jamb and sill horizontally with your level to ascertain they're level
- Verify all corners maintain 90-degree angles using a speed square
Once you've confirmed proper alignment, don't remove your shims or temporary bracing until you've completed the entire installation process. This maintains the frame's position throughout remaining steps.
Securing and Leveling
The success of your window installation hinges on precise securing and leveling techniques. Begin by placing shims at the sill's corners and midpoints to establish proper window alignment. Check the unit's level both horizontally and vertically using a 4-foot level, adjusting the shims until you achieve perfect positioning.
Once you've confirmed the window sits level, secure it temporarily with a single screw through the upper frame on each side. Don't fully tighten these screws yet – you'll need flexibility for final adjustments. Test the window's operation to confirm frame stability and smooth movement. If the sashes don't operate correctly, make minor adjustments to the shims.
Install additional shims near each mounting point, typically 4-6 inches from corners and at 16-inch intervals along the frame. Drive screws through the frame and shims into the rough opening, being careful not to over-tighten, which can distort the frame.
Double-check level, plumb, and square measurements after securing each screw. Trim excess shim material flush with the frame using a utility knife, confirming they don't interfere with later trim installation.
Sealing and Weather Protection
Three critical weatherproofing steps guarantee your window's long-term protection against moisture infiltration.
Begin by applying a continuous bead of exterior-grade caulk along the window frame's perimeter where it meets the house wrap. Next, install weather stripping around the window sash, guaranteeing proper compression when the window closes. Finally, apply a moisture barrier tape to seal the flanges, working from bottom to top to create proper water drainage.
For ideal weather protection, follow these essential guidelines:
- Apply silicone caulk in temperatures above 40°F (4°C) for proper curing and adhesion
- Install self-adhesive moisture barrier tape with minimum 2-inch overlap at all corners
- Position weather stripping in a continuous line without gaps or stretching
- Test weather seal integrity by performing a water test before completing exterior trim
Pay special attention to the bottom sill area, where water typically collects.
Create a positive slope on the sill pan using shims if necessary. Don't forget to integrate the window's weather barrier system with your home's existing water management features, including proper flashing and drip edge installation.
This thorough approach guarantees long-lasting protection against water infiltration and air leakage.
Frequently Asked Questions
How Long Does a Professional Window Installation Typically Take?
Like a well-choreographed dance, professional window installation timing varies based on key factors.
You'll find that installation duration typically ranges from 30 minutes to 2 hours per window. Your window types greatly impact the timeline – standard-sized single-hung windows are quickest, while custom bay windows or special installations take longer.
You can expect a team of professionals to complete 8-10 standard windows in a single day under normal conditions.
Can I Install Windows During Winter or Rainy Weather?
While you can technically install windows in winter or rain, you'll face some challenges.
Cold temperatures can affect window insulation materials and sealants, making them less effective or harder to work with. You'll need to carefully monitor weather conditions and choose a day with minimal precipitation and temperatures above 40°F (4°C).
It's best to work in small sections, protecting the opening from moisture and maintaining indoor temperature stability during installation.
What's the Average Lifespan of a Properly Installed Window?
You can expect your windows to last 15-25 years on average, though window durability varies by type and material.
Vinyl windows typically last 20-25 years, while wood windows can endure 30+ years with proper maintenance.
Installation quality greatly impacts longevity – properly installed windows will reach their full lifespan potential.
You'll get the best performance when you maintain weatherstripping, regularly clean tracks and hardware, and address any seal issues promptly.
Should I Replace All House Windows at Once or Gradually?
While it may strain your wallet initially, replacing all windows simultaneously offers significant advantages.
You'll benefit from uniform aesthetics throughout your home and potentially secure better contractor pricing.
However, if cost considerations are paramount, you can opt for a phased approach by prioritizing the most deteriorated windows first.
Just guarantee you're maintaining consistent style and specifications across installations to preserve your home's cohesive look, regardless of your chosen timeline.
How Much Money Can New Windows Save on Energy Bills Annually?
You can expect to save between $100-$500 annually on your energy bills with new energy-efficient windows, though exact savings vary based on your climate, home size, and current window condition.
ENERGY STAR certified windows typically deliver 12-33% in cost savings on heating and cooling expenses.
For maximum energy efficiency, look for double-pane or triple-pane windows with low-E coatings and proper weatherstripping.
Your actual savings will depend on replacing all windows simultaneously.