Professional window installation follows ten critical steps to guarantee peak performance and durability. You’ll need to take precise measurements, safely remove the existing window, examine the opening for damage, position the new window correctly, and secure the frame with proper shimming. After installation, you’ll apply weatherproof caulking, install interior trim, and conduct thorough quality checks. Following this systematic approach certifies a professional-grade installation that meets industry standards and optimizes energy efficiency.
Taking Accurate Window Measurements

Precision measurements form the foundation of successful window installation. In this Step-by-Step Guide, you’ll learn how to properly measure your window opening to guarantee a perfect fit.
Start by using your tape measure to determine the frame’s width at three points: top, middle, and bottom. Record the smallest measurement. Next, measure the height along both jambs and the middle, again noting the smallest dimension. To verify if the frame is square, measure the diagonals from corner to corner. If there’s a discrepancy of 1/4 inch or less, you can compensate with shims during installation.
Don’t forget to check the sill’s slope using an angle-measuring tool. This critical measurement confirms you’ll order replacement parts that match your window opening’s specifications perfectly. These precise measurements will prevent costly mistakes and ensure a professional installation.
Removing Your Existing Window
Before removing your old window frame, you’ll need to protect adjacent wall surfaces with drop cloths and masking tape to prevent damage during extraction. Using a reciprocating saw and pry bar, carefully cut through any nails or screws securing the frame while maintaining the structural integrity of the surrounding rough opening. Dispose of the old window materials according to local regulations, being mindful of potential hazards like broken glass or lead-based materials in older installations.
Safe Window Frame Removal
When removing an existing window frame, proper technique and safety protocols are essential to prevent structural damage and certify a clean installation surface. You’ll need to carefully separate the old window frame from the surrounding structure using a pry bar and specialized removal tools.
- Score the perimeter of the window frame with a utility knife to break any paint or caulk seals, then remove any exposed fasteners with a pry bar or reciprocating saw
- Work systematically around the frame, starting from one corner and gradually loosening the entire unit while checking for hidden nails or screws
- Inspect the rough opening after removing the old window frame, clearing any debris or damaged material to validate a solid foundation for the new installation
Continue inspecting the opening’s structural integrity before proceeding with the new window installation.
Protect Surrounding Wall Areas
Following proper frame removal, protecting the surrounding wall areas demands careful attention to preserve the structural and aesthetic integrity of your workspace. During the window installation process, you’ll need to shield adjacent surfaces, including moldings and facings, from potential damage that could compromise the final result.
Place protective materials around the frame opening to safeguard the existing insulation around the frame and prevent debris from affecting nearby surfaces. A proper installation requires maintaining the wall’s structural integrity throughout the removal process. You’ll want to avoid any improper installation practices that could lead to costly repairs or compromise the window’s weathertight seal. Cover floors and furniture in the immediate area, and use drop cloths to catch any falling debris that could damage surrounding fixtures or finishes.
Handle Old Materials Carefully
The proper removal of existing window materials requires methodical handling to prevent structural damage and safeguard workplace safety. During your window installation project, you’ll need to carefully extract the existing frame while protecting surrounding structures and materials.
- When removing the old window frame, work systematically to prevent damage to adjacent moldings, facings, and wall surfaces that you’ll need for the new installation.
- You’ll want to remove and properly dispose of window weights, which may contain lead materials. Handle these with appropriate safety precautions and follow local disposal regulations.
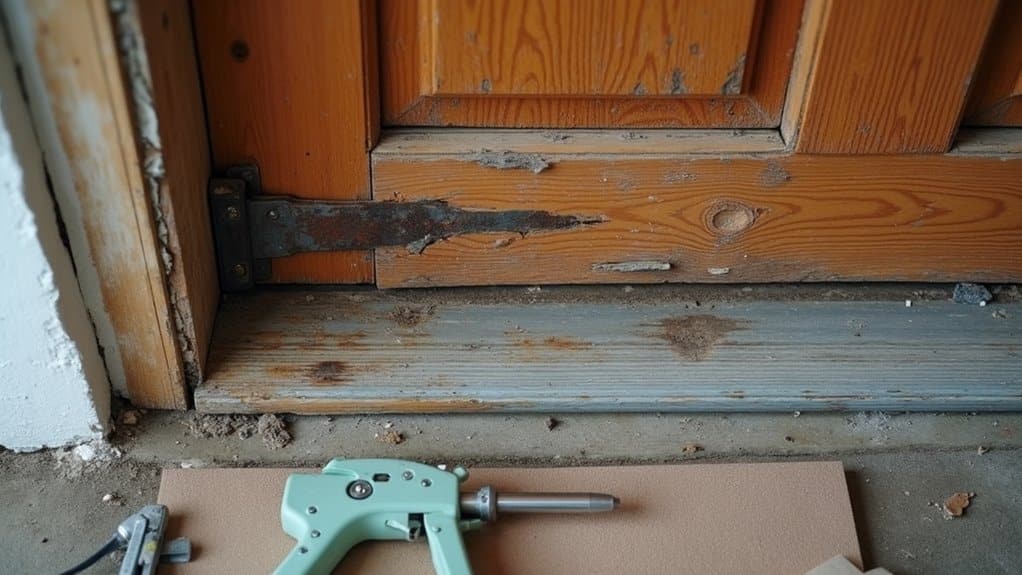
- Inspect the frame opening after removal and repair any deterioration before installing the new unit. Fill small holes with wood putty and address any structural issues to secure a proper fit for the replacement window.
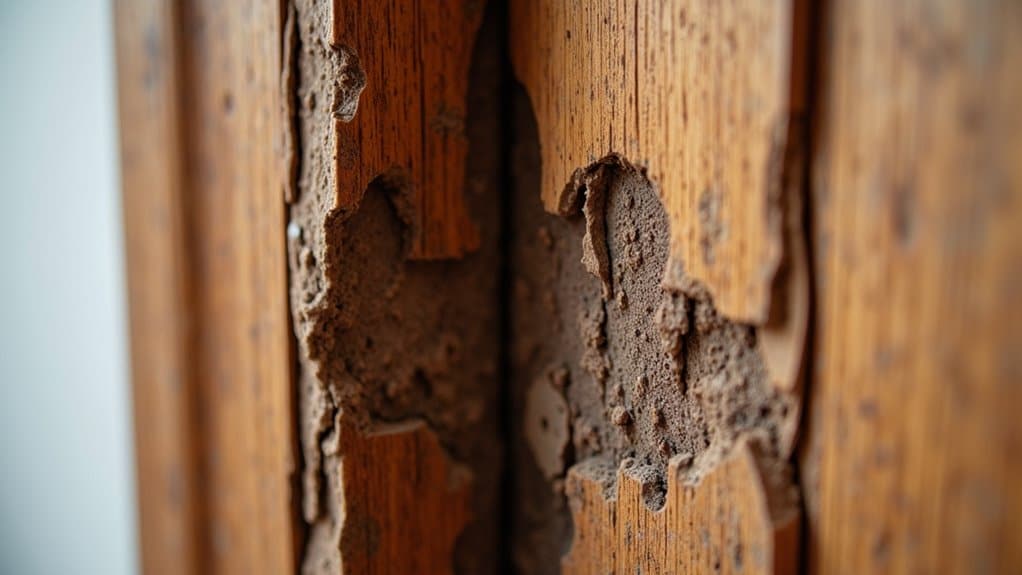
Examining The Window Opening
You’ll need to thoroughly inspect the window opening for any signs of structural damage, rotting wood, or deterioration that could compromise your installation. Take precise measurements of the opening’s width and height at three points (top, middle, and bottom) and verify the opening’s squareness by comparing diagonal measurements, which shouldn’t differ by more than 1/4 inch. Once you’ve confirmed the structural integrity, remove any existing window stops, trim, or debris, and clean the surfaces thoroughly to guarantee proper adhesion of new materials.
Structural Integrity Check
Before installing a new window, carefully inspect the structural integrity of the rough opening to confirm it can properly support the unit’s weight and withstand environmental forces. You’ll need to examine several key areas to verify a successful installation.
- Check the header, jambs, and sill for signs of water damage, rot, or deterioration that could compromise the frame’s stability. Replace any damaged materials before proceeding.
- Validate that the rough opening is square, level, and plumb using appropriate measuring tools. The opening must be within 1/8 inch of square for proper installation.
- Inspect the surrounding wall structure for cracks, separation, or other structural issues that could affect the window’s performance. Pay particular attention to load-bearing elements above the opening.
Remember that addressing structural concerns now prevents costly repairs later.
Measuring Critical Areas
Proper measurement of the window opening serves as the foundation for a successful installation project. You’ll need to measure the window frame precisely to guarantee a tight fit and optimal energy efficiency.
| Measurement Area | Action | Record |
|---|---|---|
| Width | Check top, middle, bottom | Smallest measurement |
| Height | Check left, middle, right | Smallest measurement |
| Diagonal | Corner to corner | Both directions |
| Square | Compare diagonals | Within 1/4″ difference |
| Sill | Measure slope angle | For replacement parts |
Take multiple measurements of the frame’s width and height, always using the smallest measurement as your reference. Check the frame’s squareness by measuring diagonals – if they’re within 1/4 inch difference, you can adjust with shims. Don’t forget to measure the sill slope angle for proper replacement part specifications.
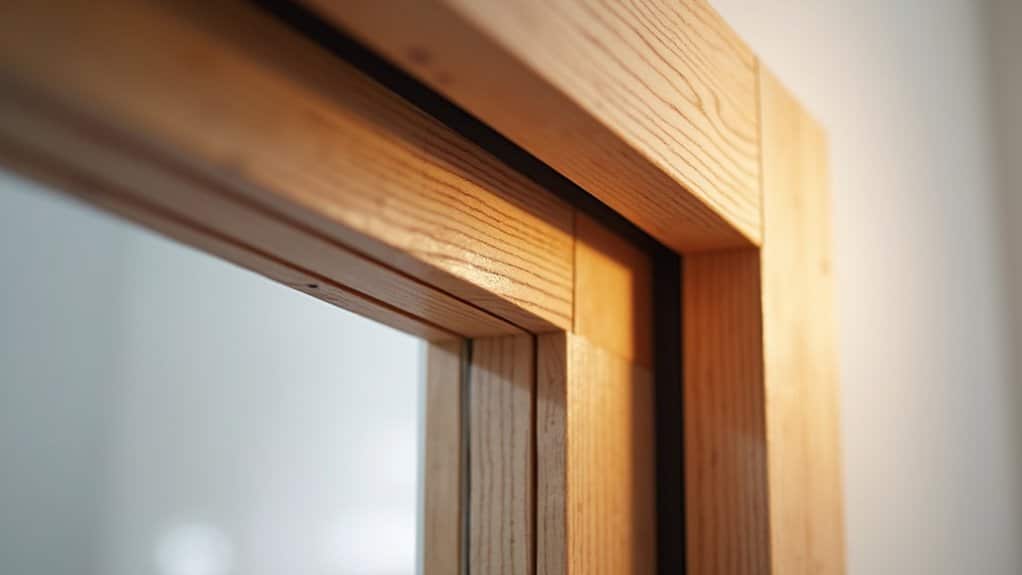
Proper Window Positioning

When installing a new window, precise positioning within the frame serves as the foundation for ideal performance and energy efficiency. You’ll need to position the glass as close to the exterior of the opening as possible to create a tight seal and minimize thermal transfer, ultimately reducing your energy costs.
To achieve optimal window positioning:
- Place the window frame against the exterior stop, situating it as far outward as the opening allows for maximum thermal protection
- Check that all corners maintain perfect 90-degree angles using a carpenter’s square to prevent drafts and guarantee proper operation
- Verify the window is perfectly level and plumb using a reliable level tool, adjusting shims as needed to maintain precise alignment
This positioning technique safeguards optimal performance and longevity of your window installation.
Securing The New Window Frame
The next critical stage in window installation involves securing the frame with absolute precision. You’ll need to position quality shims strategically around the window frame to achieve perfect alignment and guarantee all corners maintain precise 90-degree angles.
Begin by drilling pilot holes at manufacturer-specified intervals, being careful not to compromise the frame’s structural integrity. When securing the window, use the recommended fastener type and insert screws with controlled pressure. Don’t overtighten, as this can distort the frame and impair operation. You’ll want to verify the frame remains square and level throughout the fastening process.
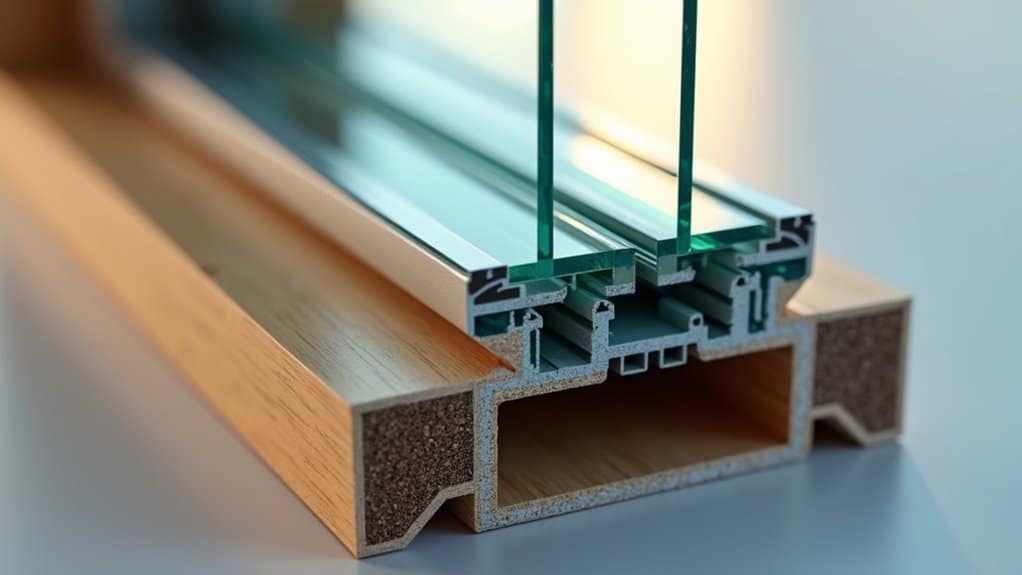
Installing Insulation Materials

After securing the window frame, you’ll need to address thermal performance by installing appropriate insulation materials. Begin by inspecting the gap between your new windows and the rough opening to determine the most suitable insulation method for your climate zone.
- Apply expanding foam insulation around the frame’s perimeter, ensuring complete coverage without over-filling, as excessive expansion can distort the frame
- Caulk along the interior and exterior joints where the window meets the frame, using a weather-resistant sealant appropriate for your climate
- Install fiberglass batt insulation in larger cavities between the frame and rough opening, or consider blown-in insulation for difficult-to-reach areas
Remember to check your local building codes for specific R-value requirements and maintain proper ventilation during the installation process. Proper insulation substantially impacts your window’s energy efficiency and long-term performance.
Applying Exterior Caulking
You’ll need to select a professional-grade exterior caulk that’s specifically formulated for window installations and can withstand environmental stresses while maintaining flexibility. To create a weather-tight seal, apply a continuous bead of caulk between the window frame and exterior siding, maintaining consistent pressure on the caulk gun for uniform distribution. Your caulk bead should achieve ideal joint thickness according to manufacturer specifications, typically allowing for proper expansion and contraction while ensuring long-term performance and moisture protection.
Choosing Quality Caulk Material
Selecting high-quality exterior caulk represents a critical step in guaranteeing long-term window performance and weather resistance. You’ll need to choose a 100% silicone caulk that meets ASTM C920 standards to create a reliable weathertight barrier around your window frame.
When selecting your exterior-grade caulking material, focus on these essential qualities:
- Superior adhesion and flexibility to withstand temperature fluctuations and structural movement
- Paintable formulation that maintains durability when exposed to outdoor elements
- Full compatibility with your window frame material and surrounding surfaces
For ideal performance, use only high-grade silicone caulk rather than latex alternatives. Before application, ensure proper surface preparation through thorough cleaning and priming when required. This attention to material selection will considerably impact your window installation’s long-term effectiveness and durability.
Weather-Tight Seal Application
Once the window frame is properly positioned and secured, creating a weather-tight seal requires precise application of exterior caulking along the frame’s perimeter.
You’ll need to apply a continuous bead of high-quality silicone caulk between the window frame and surrounding materials, including siding and trim. Select a caulk that’s compatible with your window and building materials, guaranteeing it maintains flexibility for thermal expansion. As you work, use a putty knife or your finger to smooth the bead, creating uniform contact with both surfaces.
To maintain the weather-tight seal’s integrity, you’ll need to inspect the caulking regularly for signs of deterioration or separation. Replace any compromised sections promptly to prevent air and water infiltration. This attention to detail during application and maintenance preserves optimal window performance and energy efficiency throughout its service life.
Proper Bead Techniques
Professional caulking application requires three fundamental techniques to achieve a watertight exterior seal. When applying silicone caulk to window frames, you’ll need precise control and proper environmental conditions to guarantee optimal results. The curing process demands temperatures above 40°F and installation away from direct sunlight.
- Position your caulk gun at a 45-degree angle against the window frame, maintaining steady pressure to create a continuous, even bead around the entire perimeter
- Select a silicone caulk that’s specifically compatible with your window frame material and exterior siding to prevent future adhesion failures
- Smooth the applied bead immediately using a wet finger or specialized caulk tool to create a professional finish that maximizes weatherproofing
Remember to verify material compatibility before beginning, as incorrect caulk selection can lead to premature failure and potential water infiltration.
Finishing Interior Trim Work
After completing the window installation, the interior trim work provides essential finishing touches that enhance both aesthetics and functionality. Whether you’re working with new construction windows or a replacement project, proper trim installation is pivotal for a professional finish.
Begin by installing the window sills, ensuring they’re level and properly sealed to prevent air infiltration. Next, attach interior trim components like casing and stools using finish nails to cover raw frame edges. Maintain consistent spacing and tight joints throughout the installation process. You’ll need to fill any nail holes or gaps with wood filler, then sand the surface thoroughly for a smooth finish. Complete the process by applying caulk along the trim’s interior edge where it meets the wall, creating a seamless joining that complements your exterior trim work.
Performing Site Cleanup
The complete window installation process requires meticulous site cleanup to ascertain customer satisfaction and workplace safety. When hiring a professional for your Energy-Efficient Windows project, you’ll notice they follow strict cleanup protocols that distinguish Best Replacement services from DIY attempts.
Professional home improvement contractors guarantee thorough site restoration through:
- Removal of old window components, packaging materials, and installation debris, leaving no trace of the replacement process
- Complete vacuuming and wiping of all affected surfaces, including windowsills, frames, and surrounding areas
- Proper disposal of materials according to local regulations, separating recyclable items from general waste
This detailed cleanup approach protects your investment and maintains the aesthetic appeal of your newly installed windows. You won’t need to worry about post-installation cleanup, as professionals handle everything from start to finish.
Final Quality Assessment
Quality assurance marks the critical final phase of window installation, requiring systematic evaluation of multiple performance indicators. You’ll need to inspect each window’s mechanical functionality by testing sashes, locks, and operational components to guarantee smooth movement without binding or resistance.
Using a level and square, verify that windows maintain proper plumb and alignment within their frames. This precision prevents potential air and water infiltration points. Check weatherstripping and caulking application around the perimeter, confirming continuous, uniform seals at all junction points.
Conduct air infiltration testing by securing windows in their locked position and identifying any draft zones. Document your findings and prepare thorough maintenance guidelines for the homeowner, detailing specific care instructions that’ll preserve the windows’ performance characteristics and energy efficiency standards over their service life.
Frequently Asked Questions
How to Install a Window Step by Step?
Start by ensuring proper window frame preparation, removing old materials and checking for damage. You’ll need to apply a continuous bead of sealant around the rough opening’s perimeter. Set your window unit level and plumb, then secure it with fasteners. Don’t forget critical trimming requirements both inside and out. Finally, implement proper weatherstripping techniques around the window’s edges for ideal energy efficiency. Test the window’s operation and check for gaps.
Which Are Windows Installation Procedures?
You’ll need to follow specific procedures when installing windows. Start by taking precise window measurements of the rough opening, ensuring a proper fit. Next, apply a continuous bead of sealant around the opening’s perimeter. Don’t forget to meet insulation requirements by adding weatherstripping and foam insulation around the frame. Finally, complete trim installation by securing interior and exterior casings for a finished look and weather-tight seal.
Do Windows Go Before or After Sheathing?
You’ll want to install windows after the sheathing for ideal window positioning and structural integrity. This sequence allows you to properly integrate the window with your framing considerations and weatherproofing techniques. By installing after sheathing, you’ll achieve better insulation requirements and create a more effective moisture barrier. It’s industry standard practice because you’ll get proper alignment, easier flashing installation, and a more secure attachment to the building’s structure.
Do New Windows Get Installed From Inside or Outside?
You’ll find that new windows are typically installed from the outside of your home. This exterior access method guarantees proper window orientation and framing alignment while providing installers with ideal workspace. While it’s possible to install from inside, professional contractors prefer working from the exterior for better installer safety and weatherproofing. The outside approach allows you to properly integrate the window with your home’s weather barrier and exterior cladding systems.