


Keep your swinging windows pristine and functional with these essential steps: gather cleaning supplies like microfiber cloths and glass cleaner, remove screens and hardware, inspect alignment and seals, vacuum tracks, wash both sides of glass, test operation, maintain weather stripping, and reinstall components. You’ll need a bucket with warm soapy water, squeegee, and soft brush for best results. Follow our detailed maintenance guide to maximize your windows’ lifespan and efficiency.
Gathering Essential Cleaning Supplies

Before beginning any window cleaning project, you’ll need to gather all the essential supplies to guarantee efficient and effective results. Start by collecting a vacuum cleaner or soft brush for removing loose debris and dust from window frames and tracks. You’ll also need a bucket filled with warm soapy water for cleaning screens and frames.
A high-quality microfiber cloth is pivotal for streak-free results avoid paper towels or regular rags that can leave lint behind. Include a reliable glass cleaner in your supplies, ensuring it’s appropriate for your window type and won’t damage the frames. While optional, a squeegee can help achieve professional-looking results. Having all these tools ready before you start will streamline your cleaning process and help you achieve spotless, well-maintained swinging windows.
Removing Screens and Hardware
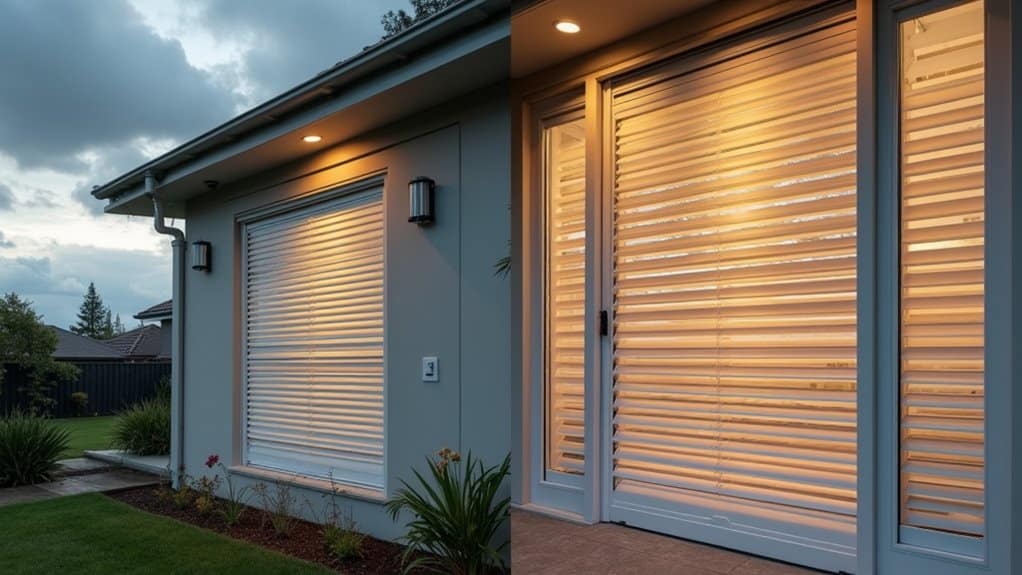
To access your window’s glass surface properly, you’ll need to remove any screens and hardware that may obstruct your cleaning efforts. Start by rotating the screen clips upward and carefully lifting out the screen from your casement window. If your window has a removable grill, detach it to gain full access to the glass surface.
| Component | Maintenance Action |
|---|---|
| Screen | Rotate clips and lift out |
| Grill | Remove if detachable |
| Crank mechanism | Open window fully |
Operate the crank mechanism by lifting the lock handle and winding until the window is completely open. This position allows you to reach both sides of the glass effectively. Before proceeding with cleaning, remove dirt and debris from the window edges and sash track using a dry rag or brush. Regular cleaning guarantees smooth operation of your casement window components.
Inspecting Window Alignment and Seals

Before washing your windows, you’ll need to carefully inspect the alignment by checking for uniform gaps between the sash and frame on all sides. Use a level to verify the window’s position, as improper alignment can cause operational issues and compromise the window’s energy efficiency. Test the weather stripping by running your hand along the edges to detect any spots where the seal might be broken or deteriorated.
Check Gaps Around Frame
While cleaning your windows provides the perfect opportunity to inspect their condition, checking the gaps around the frame deserves special attention. Examine the spacing between the window frame and sash on all sides, looking for consistent gaps that indicate proper alignment. You’ll want to check if the window has shifted, as this can compromise weatherproofing and operation.
Clear any dirt and debris from the tracks to guarantee smooth movement. Test the locking lever’s operation while the window is open, as misalignment can affect its functionality. Pay close attention to the sash, checking for signs of warping or distortion that might create uneven gaps. These gaps not only affect your window’s performance but can also lead to drafts and increased energy costs if left unverified.
Measure Window Level Position
After checking the frame gaps, accurate measurement of your window’s level position guarantees exemplary functionality and weatherproofing. Use a level tool to check if your casement windows are properly aligned both horizontally and vertically. Check the windows thoroughly, paying special attention to the window frame and weatherstripping for any signs of gaps or damage that could affect the seal.
- Inspect window hinges and hardware components to verify they’re operating smoothly without causing binding or sagging issues
- Use a measuring tool to confirm consistent spacing between the sash and frame on all sides, affirming proper window alignment
- Examine weatherstripping integrity around the entire perimeter, looking for compression issues or damaged sections that could compromise energy efficiency
Document any discovered alignment problems or seal deficiencies for immediate repair to maintain ideal window performance and energy conservation.
Test Weather Stripping Integrity
Proper weather stripping integrity plays an essential role in maintaining your window’s energy efficiency and functionality. Begin your inspection by examining the weather stripping around the frame for signs of wear, cracking, or visible gaps that could compromise the seal.
Verify that your window sash sits evenly within the frame, ensuring consistent spacing on all sides for ideal sealing. Test the hinges and hardware for any looseness that might affect the window’s ability to close properly. Use a smoke pencil to detect drafts and identify areas where air might be infiltrating. Don’t forget to check that the locks engage fully and create a tight seal when closed. If you notice signs of damage or deterioration in the weather stripping, address these issues promptly to maintain energy efficiency and prevent air leakage.
Cleaning Tracks and Window Frame

To maintain ideal window function and appearance, regular cleaning of tracks and frames is essential. Start by vacuuming the window tracks to remove loose debris, then wipe down the frame using a damp cloth, focusing on corners where dirt accumulates. After cleaning, inspect the tracks for any damage that could impair smooth operation. Apply a silicone-based lubricant to guarantee windows move effortlessly.
- Remove dirt and debris from tracks using a vacuum cleaner or brush, paying special attention to hidden corners and crevices
- Clean the window frame thoroughly with a damp cloth, avoiding harsh chemicals that could damage the finish
- Lubricate tracks and hinges with silicone-based products to maintain smooth operation and prevent sticking
Remember to perform these maintenance tasks regularly to extend your windows’ lifespan and maintain their functionality.
Washing Both Sides of Glass
With your tracks and frame now clean, achieving crystal-clear windows requires thorough attention to both sides of the glass. To clean your casement windows effectively, start by removing the screen and opening the window completely. Mix warm water with mild dish soap to Clean the Window’s exterior, using firm strokes with your cleaning solution. Follow up with a squeegee to remove excess water.
For the interior glass, apply your preferred glass cleaner directly and wipe with a clean cloth, preferably microfiber, to guarantee a streak-free finish. You’ll want to Clean Casement windows twice yearly to maintain maximum visibility and energy efficiency. Once you clean and dry both surfaces thoroughly, you’ll notice a significant improvement in clarity and performance. Remember to work systematically from top to bottom for the best results.
Lubricating Moving Parts and Mechanisms
Regular lubrication of your window’s moving components is essential for maintaining smooth operation and extending their lifespan. Before you use silicone spray, clean the tracks with a damp cloth and guarantee they’re completely free of water. Choose a silicone-based lubricant rather than oil-based products, as these can attract unwanted dirt and compromise your window’s ability to open and close properly.
- Clean and dry the tracks thoroughly, removing all debris before applying lubricant
- Apply silicone spray to hinges, cranks, and other moving mechanisms, wiping away excess product
- Open and close the window several times to help the lubricant penetrate all joints
After application, use a clean cloth to remove any excess lubricant from visible surfaces. This prevents dirt accumulation and maintains your window’s appearance while ensuring smooth operation.
Testing Window Operation
Test your window’s operation by smoothly opening and closing it several times, paying attention to any resistance or unusual sounds that might indicate problems. While testing the movement, verify that your window stays firmly in place at various positions and doesn’t slide unexpectedly. Check that all locking mechanisms click into place properly and provide secure engagement when activated.
Check Opening Movement
Before proceeding with any window cleaning, you’ll need to verify that your windows operate correctly through their full range of motion. A casement window fully designed to swing should operate smoothly, giving you better access for thorough cleaning. Test the window’s movement by opening and closing it completely, ensuring the sash glides effortlessly without binding or sticking.
- Open the window entirely and check that it remains stable in the open position without drifting closed this is essential for safe cleaning access
- Verify the crank mechanism turns easily and the locking system engages properly without resistance
- While the window is open, wipe down the hinges and tracks to maintain smooth operation and prevent future issues
Inspect Locking Mechanisms
When inspecting your window’s locking mechanisms, it is crucial to understand how the components work together for ideal security and operation. Check that the locking bolt properly slides along the keeper’s sloping section and rests firmly on the flat portion when engaged.
You’ll need to guarantee smooth movement of the locking lever, which should require substantial force to open and close. If you’re experiencing resistance, examine the sash for warping, as this can affect the locking mechanism’s alignment. Consider adjusting the bolt length or keeper profile if the lock isn’t operating correctly.
To maintain proper function of all moving parts, apply the right lubricant oil-based lubricants work best. Keep your windows locked whenever they’re not in use to preserve alignment and prevent potential damage to the mechanism.
Maintaining Weather Stripping
Maintaining proper weather stripping around your swinging windows is essential for maximizing energy efficiency and preventing drafts. You’ll need to regularly inspect the stripping for signs of wear, including cracks, tears, or gaps that could compromise its effectiveness. Using a soft cloth dampened with mild detergent and clean water, remove any dust and debris that has accumulated on the weather stripping surface.
- Inspect weather stripping every six months, paying close attention to corners and meeting points where wear typically occurs first
- Apply appropriate lubricant to keep the stripping flexible and prevent it from drying out or becoming brittle
- Clean the weather stripping thoroughly with mild detergent and water, ensuring it’s completely dry before closing the window
Consider upgrading to higher-quality weather stripping materials if you notice persistent issues with your current installation.
Reinstalling Screens and Hardware
With your windows’ weather stripping in good condition, the next step involves properly reinstalling screens and hardware components. Align your screen frame carefully around the window frame and secure all clips firmly in place. Use a soft brush to remove any debris from hardware components before reinstallation.
To keep your casement windows operating smoothly, inspect all hinges, cranks, and latches for wear. Apply a silicone-based lubricant to moving parts, being careful to wipe away excess lubricant that could attract dirt. When reattaching hardware, follow the manufacturer’s specifications for proper alignment and avoid overtightening screws, which can strip the threading. Monitor your hardware regularly for signs of deterioration and address any issues promptly to maintain ideal window function and prevent air infiltration.
Scheduling Regular Maintenance Checks
You’ll want to perform quick visual inspections of your casement windows monthly, checking for condensation, cracks, and proper operation of the crank mechanism. Clean your window tracks every three months to prevent debris buildup that could impede smooth operation and cause sticking issues. Test your windows’ full range of motion during spring and fall maintenance sessions, ensuring the control arms move freely and the cranks turn without resistance.
Monthly Visual Window Checks
Regular visual inspections of casement windows form the cornerstone of effective window maintenance. You’ll need to conduct monthly checks of your window frames, sashes, and hardware to identify potential issues before they become serious problems. When examining your casement windows, pay close attention to the operational components and weatherstripping to guarantee optimal performance and energy efficiency.
- Inspect the window frame and glass for cracks, warping, or signs of water damage that could compromise the window’s integrity
- Test the crank mechanism by opening and closing the window, ensuring smooth operation without resistance
- Examine weatherstripping around the perimeter for gaps or wear that might affect your window’s seal
Document any issues you discover during these checks and schedule necessary repairs promptly. This proactive approach helps maintain your casement windows’ functionality and extends their lifespan.
Track Cleaning Schedule
Since proper maintenance directly impacts your casement windows’ longevity, establishing a consistent track cleaning schedule is indispensable. You’ll need to clean your casement windows thoroughly twice per year, using a mild soap solution or white vinegar mixed with water.
When Cleaning Casement tracks, remove all debris and grime from the control arm track. After applying soap and water, guarantee you dry completely all components to prevent rust formation. While cleaning, inspect for condensation between panes and test the window’s operation it should open and close smoothly without resistance. Pay special attention to the window seals, as they’re vital for maintaining energy efficiency. If you notice any issues with the crank mechanism, apply lubricant after cleaning. Don’t forget to check both interior and exterior surfaces during your bi-annual maintenance routine.
Seasonal Operation Tests
Building on your track cleaning routine, seasonal operation tests serve as an essential checkpoint for your casement windows’ performance. Make sure you’re inspecting your windows regularly, at least twice yearly during spring and fall, to prevent dirt and dust from affecting their operation. By ensuring smooth functionality through these tests, you’ll identify potential issues before they become major problems.
- Test the opening and closing mechanisms thoroughly, checking for any resistance or unusual sounds that might indicate maintenance needs
- Examine all weatherstripping and seals closely, as these components can attract dirt and affect your window’s energy efficiency
- Inspect hinges and hardware components, tightening loose parts and lubricating where necessary to maintain ideal performance
Document your findings during each inspection to track changes and anticipate necessary repairs or replacements.
Frequently Asked Questions
How to Clean Windows Step by Step?
Start by mixing a soapy water solution or vinegar-based cleaner in a bucket. You’ll want to first wipe down your windows with a microfiber cloth to remove loose dirt. Next, apply your cleaning solution and use proper squeegee techniques, working from top to bottom in overlapping strokes. For mirror finish results, try the newspaper wiping method as a final step it’s an old-school trick that actually works great for streak-free shine.
How to Maintain Crank Windows?
To maintain your window crank mechanism, you’ll need to apply silicone-based lubricant regularly to guarantee smooth operation. Test the window crank durability by operating it through its full range of motion. If you notice resistance, begin window crank troubleshooting by inspecting for debris or damage. For window crank repair, check hardware connections and tighten loose parts. Don’t forget to clean tracks and replace weatherstripping for ideal window crank operation.
What Is the Best Lubricant for Crank Windows?
For crank windows, you’ll get the best results with silicone-based or Teflon-based lubricants. They won’t attract dirt and provide long-lasting protection for your window’s moving parts. While white lithium grease and graphite powder can work, they’re not ideal for this application. You should avoid WD-40 and machine oil as they can damage window components and attract debris. Apply your chosen silicone or Teflon lubricant sparingly to guarantee smooth operation.
Does Vinegar and Dawn Clean Windows?
Yes, a vinegar based cleaner made with Dawn dish soap creates an effective window cleaning solution. You’ll get streak free results by mixing equal parts white vinegar and water with a few drops of Dawn. For best application, spray the mixture liberally and wipe with a microfiber cloth using overlapping strokes. This ammonia free cleaner is especially effective when paired with proper squeegee technique, moving from top to bottom in a continuous motion.