
Transform your windows into stunning focal points with these budget-friendly Dollar Tree crafts! You’ll discover how to create gorgeous stained glass effects, seasonal window clings, and custom privacy screens for a fraction of retail costs. Get creative with DIY valances, suncatchers, and decorative message boards that’ll brighten any room. From window-mounted bird feeders to holiday decorations, these 15 easy projects will help you refresh your space while keeping your wallet happy. Let’s explore these amazing window transformations together!
Transform Plain Windows With Stained Glass Effects

Looking to add a stunning visual element to your home without breaking the bank? You can create gorgeous stained glass-inspired window decorations using simple Dollar Tree supplies. This budget-friendly project lets you transform ordinary windows into eye-catching focal points that’ll brighten any room.
Start with basic Dollar Tree items and repurpose them into stunning window displays that capture and filter light beautifully. You’ll love how easy it is to customize colors and patterns to match your home’s aesthetic. Whether you’re designing seasonal decorations like Easter displays or year-round window art, the possibilities are endless.
The best part? These decorative pieces look far more expensive than their dollar store origins suggest. You’ll achieve a high-end stained glass effect while staying within budget, proving that creative window transformations don’t require specialty art supplies.
Create Seasonal Window Clings From Scratch
When you’re ready to take your window decorating to the next level, creating custom seasonal window clings is an amazingly versatile project that’ll transform your space. One of my favorite techniques is using opaque backgrounds on transparent clings, then arranging them with festive elements like mini pumpkins, sunflowers, and autumn leaves.
Start by designing your clings with a template, then photograph your arrangement for reference. You’ll love how these decorations aren’t just for windows they’re perfect for coasters, photo frames, and mini fall risers too! Simply secure them with Mod Podge, applying two protective coats if you’re making coasters. This budget-friendly craft lets you create unique seasonal decor that’s both practical and beautiful. Mix and match different elements to design custom pieces that’ll work perfectly in any room.
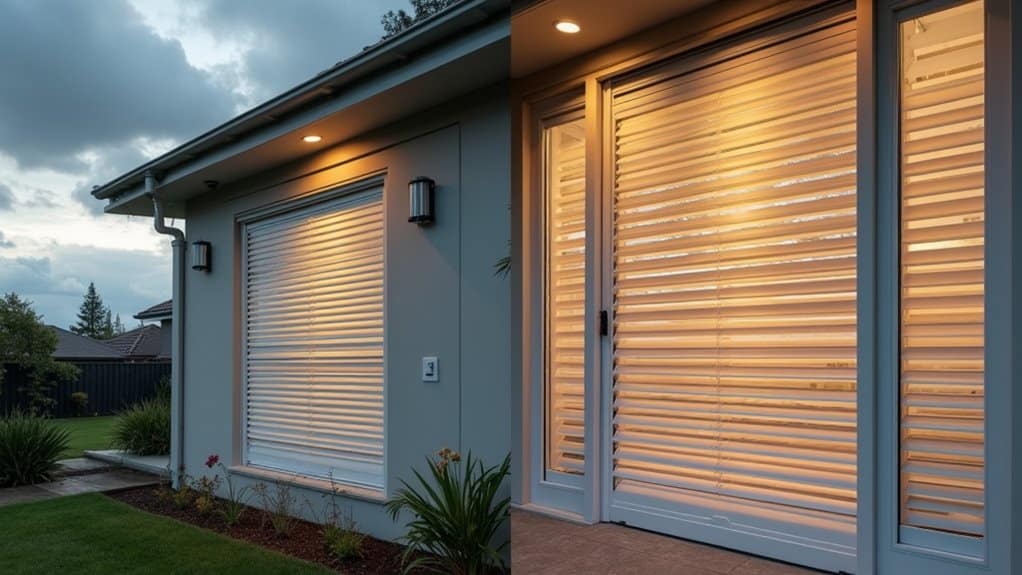
Design a Budget-Friendly Window Privacy Screen

Creating an elegant privacy screen doesn’t have to break the bank, especially with Dollar Tree’s affordable supplies at your fingertips. You’ll love how tension rods can transform into adjustable fabric panels that perfectly suit your space and style.
Start by selecting a basic shower curtain and cutting it into hanging privacy screens that match your window dimensions. You can easily customize these panels with decorative elements like ribbons, faux flowers, or even layered window clings for added visual interest. If you’re feeling creative, try combining different customizable embellishments to achieve your desired level of privacy and aesthetic appeal.
For an extra designer touch, top your window with a DIY valance made from Dollar Tree canvas and coordinating fabrics. You’ll achieve a polished, high-end look while keeping your budget firmly intact.
Make Your Own Window Valance Display
Your custom window valance will transform any room with minimal investment when you start with basic materials like fabric, fusible webbing, and a mounting board. You’ll love experimenting with patterns by mixing complementary fabrics or creating your own designs using stencils and fabric paint. Whether you’re going for a casual cottage look or an elegant formal style, you can adapt your valance pattern to match your home’s unique personality.
Essential Window Valance Materials
Several budget-friendly materials make DIY window valances a breeze to create! You’ll need a sturdy tension rod or curtain rod that fits your window frame perfectly. Head to the dollar store to pick up various essential fabric textures, from lightweight cotton to shimmery organza. Don’t forget to grab coordinating ribbons and trims that’ll add depth to your custom tailored design.
Measuring tape, scissors, and adhesive supplies are must-haves for securing your fabric pieces. Whether you prefer using clips or basic sewing supplies, you’ll want to guarantee everything stays firmly in place. Browse the dollar store embellishments aisle for fun additions like decorative bows, tassels, or pom-poms to give your valance personality. With these simple materials, you’re ready to transform your windows into eye-catching focal points without breaking the bank!
Creating Custom Patterns
When it comes to designing eye-catching window valances, custom patterns can transform your space without draining your wallet! You’ll love how easy it is to create patterned wood surfaces using simple window clings and Mod Podge from your local dollar store.
Start by crafting a cardstock template to perfectly position your custom window clings on wood rounds or coasters. For seasonal flair, mix and match smaller designs like pumpkins, sunflowers, and leaves to create decorative coaster arrangements. Don’t forget to seal your creation with two protective coats of Mod Podge to guard against drink spills. You can even extend these creative techniques to personalize photo frames and wipe-off boards with seasonal messages. The possibilities are endless, and you’ll have unique, budget-friendly decor pieces that reflect your style.
Craft a Window Corner Suncatcher

Creating a dazzling window corner suncatcher doesn’t require expensive materials or advanced crafting skills. Start with a simple glass vase from Dollar Tree and transform it into a stunning window decoration using colorful window clings. You’ll love how easy it is to create vibrant color schemes that match your home’s décor.
Begin by planning your personalized designs on the vase’s flat surface. Layer your window clings in a thoughtful placement that creates visual interest. Once you’re happy with the arrangement, seal everything in place with Mod Podge for lasting durability. Place your finished creation in a sunny corner window, and watch as it casts beautiful colored light throughout your space. You can switch up the design seasonally – try autumn leaves for fall or snowflakes for winter – using Dollar Tree’s affordable selection of window clings.
Build a Window Shelf Garden Display
Now that you’ve brightened your window corners, let’s turn your sunny windowsill into a stunning garden display! All you’ll need is a tension rod and a few dollar store baskets to create this beautiful layered window display.
Start by positioning your tension rod across the window frame, then arrange your containers at different heights for visual interest. You can customize the baskets by painting them to match your home’s style. The versatile decor options are endless fill them with succulents, small plants, or decorative items that catch your eye. Place your customized plant arrangements where they’ll catch plenty of sunlight, creating an eye-catching focal point that brings nature indoors. It’s amazing how this simple, budget-friendly project can transform an ordinary window into a charming garden showcase!
Paint Faux Frosted Glass Patterns
Transform your plain glass surfaces into elegant frosted masterpieces with this budget-friendly window craft! You’ll love how Mod Podge and window clings create stunning faux frosted effects that’ll rival expensive designer pieces. By adding stencil designs and mixing paint techniques, you’re able to customize each piece perfectly.
| Surface Type | Design Ideas | Finishing Tips |
|---|---|---|
| Wood Rounds | Pumpkins & Leaves | Double Mod Podge Coat |
| Photo Frames | Sunflowers | Template Positioning |
| Mini Risers | Fall Motifs | Combining with Wall Art |
Start by making a cardstock template to guarantee precise placement of your window clings. Apply them to wood rounds using Mod Podge, and don’t forget to seal with two protective coats. For extra flair, try decorating hexagon trays with seasonal sayings or create charming wipe-off boards with smaller designs. This versatile technique works beautifully when mixing paint techniques across different surfaces.
Assemble a Window Frame Message Board
Transform a basic Dollar Tree wooden frame into a stylish window message board with just a few budget-friendly supplies. You’ll need to secure a dry erase board or chalkboard panel inside the frame, then add your choice of decorative touches like ribbon or seasonal accents to match your style. Mount your creation on any window using suction cups, and you’re ready to start writing messages and reminders that’ll keep your home organized and looking great.
Essential Frame Assembly Steps
Creating a stylish window frame message board is a breeze with just five simple assembly steps!
Start with a basic wooden plaque or frame from the dollar store it’s the perfect foundation for your customization. Next, grab some wooden dowels or molding and glue them across the frame to create that classic window pane look. For the dry erase options, you’ll want to apply window film or transparent vinyl to the center this creates your writing surface. Now’s the fun part: decorate your frame with dollar store finds like ribbons or greenery to match your style. Finally, add wall mounting solutions like a sawtooth hanger to the back, and you’re ready to display your creation. You’ve just made a gorgeous message board that looks way more expensive than it actually is!
Materials From Dollar Store
While you might think custom message boards are expensive, you’ll be amazed at what you can find at your local dollar store! Stock up on budget-friendly materials like wooden picture frames, decorative paper, adhesive cork sheets, and colorful washi tape. You’ll also need basic supplies such as scissors, glue, and thumbtacks.
Look for frames with simple designs that match your home’s style. The dollar store often carries various sizes and finishes, making it easy to create customizable patterns for your space. Get creative with DIY display ideas by mixing and matching frame colors or adding magnetic strips for extra functionality. Don’t forget to grab some decorative pushpins and mini clothespins to hang photos, notes, and reminders. With just $10-15 worth of supplies, you’ll have everything needed for this practical project.
Design Holiday Window Decorations
Savvy crafters know that Dollar Tree offers endless possibilities for stunning Easter window decorations. You’ll love how easy it is to personalize window displays using budget-friendly supplies that transform into stained glass-inspired masterpieces. Let’s incorporate seasonal art with these creative ideas:
| Window Area | Design Ideas | Materials Needed |
|---|---|---|
| Top Panel | Hanging Eggs | Glass Paint, Plastic Eggs |
| Center Space | Floral Design | Faux Flowers, Wire |
| Bottom Edge | Bunny Scene | Window Clings, Ribbon |
To decorate window frames, you’ll find everything from adhesive gems to decorative tape at Dollar Tree. Create eye-catching displays by combining different textures and materials. You can layer window clings, add sparkly accents, and arrange floating elements to catch sunlight. Your windows will become magical focal points that celebrate spring without breaking the bank.
Create Window Box Planters From Containers
Beautiful window box planters don’t require expensive materials when you can transform dollar store containers into charming outdoor displays. Start by selecting lightweight plastic bins or wooden crates that’ll fit your window dimensions. You’ll need to add drainage holes and line wooden containers with waterproof material to prevent rotting.
Don’t worry if you can’t find the perfect size repurposing dollar store containers is easy when you can cut larger ones down to fit your specific windows. Fill your DIY planters with soil and your favorite flowers or herbs. For extra flair, add decorative finishing touches by painting the containers or using stencils to match your home’s exterior. This budget-friendly project lets you customize window box size while creating an attractive display that looks far more expensive than it actually is.
Craft Window Seat Cushions and Pillows
Creating custom window seat cushions and pillows doesn’t have to break the bank when you shop at dollar stores for supplies. You’ll love transforming basic foam and fabric into cozy seating that perfectly fits your space. Start by measuring your window seat, then get creative with coordinate fabric patterns that match your decor.
| Project | Spring | Summer | Fall | Winter |
|---|---|---|---|---|
| Cushions | Florals | Stripes | Plaids | Velvet |
| Covers | Pastels | Nautical | Earth tones | Metallics |
| Trims | Tassels | Rope cord | Braided | Pom poms |
| Paint | Butterflies | Seashells | Leaves | Snowflakes |
Add personalized decorative embellishments to make your cushions unique. Paint simple designs, sew on dollar store trims, or create seasonal design options by switching pillow covers throughout the year. You’ll achieve a custom look without spending a fortune!
Make Window Treatment Tiebacks
You’ll love how easily Dollar Tree tension rods and ribbons transform into elegant curtain tiebacks that look far more expensive than they cost. Creating these window accents is as simple as threading decorative ribbons through the rods or crafting boho-style dangles using shower curtain rings and beads. Whether you’re going for a farmhouse feel with twine and burlap or a more polished look with satin ribbons, you can quickly assemble these budget-friendly tiebacks and swap them out whenever you’re ready for a fresh window update.
Elegant Cord Design Options
Transform ordinary window treatments into designer-worthy displays with elegant cord tiebacks that won’t break the bank. You’ll love creating unique cord arrangements that add sophistication to any room using simple dollar store materials.
| Style | Description |
|---|---|
| Braided | Twist three cords for classic appeal |
| Knotted | Create nautical-inspired patterns |
| Looped | Form graceful figure-eight designs |
| Tassel | Add dramatic hanging accents |
| Twisted | Spiral two cords for modern flair |
Mix and match creative cord designs by combining different colors and textures. Try metallic cords for glamour, or natural jute for rustic charm. You can even personalize your elegant cord patterns with beads, ribbons, or decorative buttons from the craft aisle. These budget-friendly touches will give your windows a custom look that rivals expensive designer versions.
Quick Assembly Steps
Whether you’re a DIY beginner or seasoned crafter, assembling beautiful window treatment tiebacks couldn’t be simpler with Dollar Tree supplies. The simple assembly process starts with a basic tension rod that you’ll transform into an elegant window accent.
Begin by gathering your budget-friendly supplies: ribbons, twine, and decorative beads from Dollar Tree. Wrap your chosen materials around the tension rod, securing them firmly as you go. You can create a customizable design by alternating different textures and colors to match your room’s decor. Layer ribbons, weave in twine, or add beads for extra sparkle the possibilities are endless! Don’t forget to leave enough material at the ends to create secure fastening points. In just minutes, you’ll have a professionally styled tieback that looks like it cost much more than its dollar store origins.
Build a Window-Mounted Bird Feeder
Bringing nature right to your windowsill, a window-mounted bird feeder creates an up-close view of local wildlife while saving valuable yard space. You’ll love watching cardinals, finches, and chickadees visit your feeding station design throughout the day.
Start by selecting a clear plastic container from the dollar store it’ll serve as your feeder’s base. Add strong suction cups and drainage holes, then attach a small perch using craft sticks. For seed selection, mix black oil sunflower seeds with millet they’re budget-friendly options that attract a variety of birds. Consider planting bird friendly plants like sunflowers or marigolds in window boxes below your feeder to create a complete habitat. Position your feeder away from reflective surfaces and guarantee it’s securely mounted to prevent accidents.
Design Window Light Catchers
Create stunning stained glass effects without breaking the bank by turning simple Dollar Tree window clings into eye-catching light catchers. You’ll love how easily these budget-friendly decorations transform your windows into artistic displays while letting natural light dance through your space. Mix different cling materials and layer designs to achieve depth and dimension in your creations.
- Apply white chalk paint backing to transparent clings for that authentic stained glass look
- Layer seasonal motif ideas like autumn leaves, pumpkins, and sunflowers for dynamic depth
- Secure your design with Mod Podge to prevent moisture damage and guarantee longevity
- Experiment with pattern combinations by arranging clings in geometric shapes or nature-inspired scenes
Don’t forget to switch up your light catcher designs throughout the year to match different seasons and celebrations. These versatile window decorations work beautifully in any room that needs a creative touch.
Create Window Corner Decorative Arches
Transform your window corners into eye-catching focal points using affordable tension rods and Dollar Tree supplies like faux greenery, string lights, and ribbons. You’ll want to start by securing two tension rods at right angles in your window corner, making sure they’re firmly anchored before adding any decorations. Once your frame is stable, let your creativity shine by layering on fairy lights, draping soft fabrics, and attaching seasonal accents like flowers, mini lanterns, or holiday-themed ornaments from your local dollar store.
Basic Materials Needed
Whether you’re looking to add elegance to your windows or create seasonal displays, tension rods serve as the perfect foundation for DIY window corner arches. You’ll find all the basic materials you need at Dollar Tree, making this project both beautiful and budget-friendly. When selecting your tension rod size requirements, make sure to measure your windows first for ideal tension rod placement.
- Heavy-duty tension rods (2-3 per window) that can support your chosen decorations
- Seasonal garlands, lights, or ribbons for decorative tension rod attachments
- Command hooks or clear adhesive clips for additional support points
- Zip ties or floral wire to secure decorations firmly to the rods
With these simple materials, you’re ready to transform your windows into stunning seasonal showcases that you can easily update throughout the year.
Installing Corner Arch
Now that you’ve gathered your materials, let’s put them to work on your window corner arch project! Creating a beautiful arch design doesn’t have to break the bank. Start by measuring your window’s upper corners to guarantee perfect corner positioning.
| Step | Action | Tips |
|---|---|---|
| 1 | Mark corners | Use pencil lightly |
| 2 | Cut template | Follow curve guide |
| 3 | Position arch | Check symmetry |
| 4 | Secure edges | Apply adhesive |
| 5 | Add trim | Match window style |
For arch installation, place your template in the corner and trace gently. You’ll want to secure the base first, then work your way up the curve. Don’t worry if it’s not perfect that’s part of the handmade charm! Add decorative elements like paint or stencils to match your room’s style. The whole project takes about an hour and costs under $10.
Decorative Finishing Touches
Adding decorative touches to your corner arches brings personality and polish to your window project! You’ll love how simple decorative accents can transform plain corners into stunning focal points. Let your creativity shine with artistic embellishments that match your home’s style while staying within your budget.
- Paint delicate vine patterns using a foam brush and metallic craft paint – it’s an easy way to add elegance without spending much
- Attach small mirror tiles in a mosaic pattern to catch and reflect natural light throughout your room
- Create personalized elements by gluing on seashells, buttons, or vintage jewelry pieces you’ve collected
- Add dimension with dollar store foam flowers, painted to match your decor, and arrange them in cascading clusters
These finishing touches make your window uniquely yours while keeping costs low!
Frequently Asked Questions
How Long Do DIY Window Clings Typically Last Before Needing Replacement?
With proper application, your DIY window clings can last anywhere from 3-6 months! You’ll get the best storage longevity by keeping them flat between wax paper sheets when not in use. Most crafters opt for seasonal removal, swapping them out as holidays change. You can extend their life by handling them gently and keeping them away from direct sunlight. Plus, since they’re so affordable to make, you won’t mind reviving them when needed!
Can These Window Crafts Damage the Glass When Removed?
Don’t worry about your glass durability most window crafts won’t harm your windows when properly removed! To protect your window strength, you’ll want to use gentle, store-bought adhesives that are specifically labeled as window-safe. If you’re making DIY clings, stick to materials like puffy paint or washable glue that prioritize adhesive safety. When it’s time to remove them, just use warm water and they’ll come right off without any damage!
What Cleaning Solutions Are Safe to Use on Decorated Windows?
You’ll want to be gentle when cleaning your decorated windows! Your safest bet is to use vinegar-based cleaners mixed with water they’re both effective and budget-friendly. If you’re dealing with stubborn spots, rubbing alcohol solutions work great too. Just avoid harsh chemicals and stick with ammonia-free formulas to protect your window art. Here’s a money-saving tip: mix one part white vinegar with four parts water for a perfect DIY cleaner!
Are Dollar Store Supplies Uv-Resistant for Long-Term Window Display?
You’ll want to be cautious with dollar store supplies when it comes to UV ray exposure! Most budget materials aren’t designed with weather resistant composition in mind, so they can fade, warp, or deteriorate pretty quickly in direct sunlight. If you’re planning a long-term window display, it’s worth investing in materials specifically labeled for material durability. While dollar store supplies are great for temporary projects, they probably won’t hold up well against those harsh rays long-term.
How Do You Prevent Window Decorations From Peeling in Humid Conditions?
You’ll want to tackle humidity head-on to keep your seasonal window displays looking fresh! Start by applying a thin layer of clear sealant spray to your decorations it’s a game-changer for condensation prevention techniques. When you’re not using them, store items in airtight containers with silica gel packets to control moisture. Don’t forget to check your storage conditions regularly and keep decorations away from damp basements. A dehumidifier near your displays can work wonders too!