


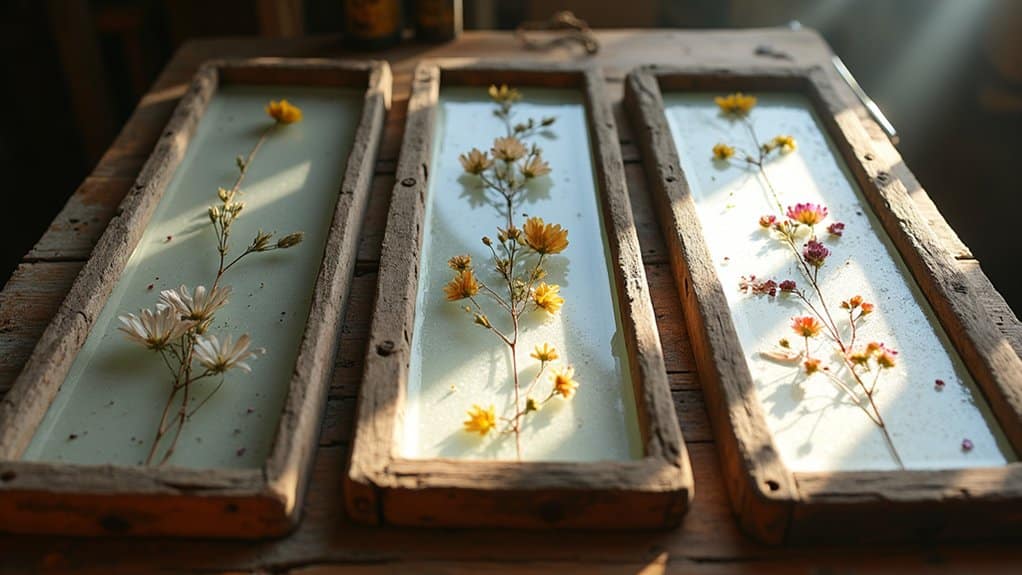
Start by thoroughly cleaning your window pane and gathering supplies like acrylic paints, brushes, and painter’s tape. Next, create your design by outlining with a paint pen or Sharpie, then fill in larger areas with paint colors in thin, even coats. Finally, enhance your piece with decorative elements like vinyl lettering, chicken wire backing, or a grapevine wreath. These basic steps will set you up for endless creative possibilities with window pane art.
Essential Supplies and Tools You’ll Need
Before commencing on your window pane craft project, you’ll need to gather several essential supplies and tools to ascertain successful results. Start with various acrylic paints, including glitter options, and collect different sized paint brushes and sponge brushes for diverse application techniques.
For precise outlines on your window frame design, grab an acrylic paint pen or Sharpie. If you’re aiming for crisp, clean lines, painters tape will be your best friend. You’ll also want to decide on your design approach – whether you’ll use printouts, stencils, or draw freehand.
Consider keeping thin brushes handy for detailed work, particularly when painting outlines that need to be opaque. These tools will confirm you’re well-equipped to create stunning window pane art that matches your vision.
Preparing Your Window Pane for Crafting
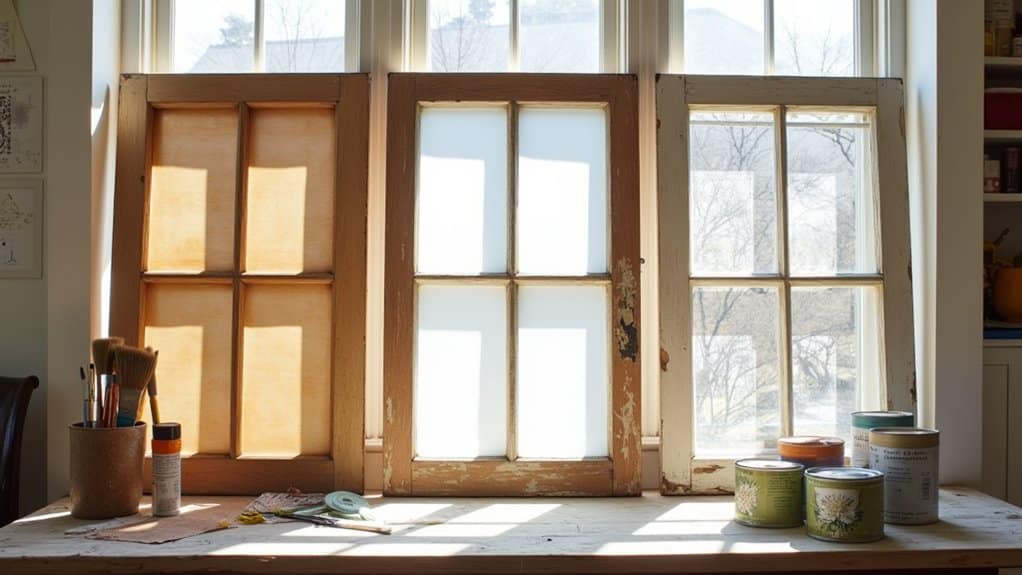
Before you begin transforming your window pane, you’ll need to thoroughly clean both sides of the glass with a streak-free cleaner and lint-free cloth to remove any dirt, dust, or fingerprints. Next, set up your crafting area on a flat, spacious surface that’s well-protected with a drop cloth or newspapers to catch any spills or drips. Once you’ve chosen your workspace, arrange all your supplies within easy reach and guarantee you have proper ventilation if you’re using any paint or chemical products.
Clean Glass Surface First
Preparing your window pane starts with achieving a pristine glass surface. First, spray your glass cleaner directly onto the window pane or dampen your microfiber cloth, then wipe away all dirt, grease, and debris. You’ll want to guarantee you’ve covered every inch of the glass surface.
Once you’ve completed the initial cleaning, use a lint-free cloth to remove any remaining streaks or smudges. For better adhesion of vinyl or paint, apply a dedicated degreaser to the glass. This extra step will make a significant difference in your final results.
Before moving forward, thoroughly dry the glass and inspect it carefully for any cracks or damage. If you spot any imperfections that might jeopardize your project, it’s best to select a different window pane.
Choose Right Work Space
When starting your window pane project, selecting an ideal workspace will set you up for success. Find a well-lit area, such as your living room with plenty of natural light, to ascertain you can see all the details clearly while working. Make sure there’s good ventilation to handle any fumes from paints or adhesives you’ll be using.
Before you begin, cover your work surface with a drop cloth to protect it from spills and stains. Position your window in a stable spot where it won’t shift while you’re working you can secure it by clamping it to a table. Keep all your supplies within arm’s reach to maintain a smooth workflow. This organized setup will help you focus on creating your decorative piece without interruptions or accidents.
Adding the Base Design Elements
Start by measuring your window space and scaling up your design to fit perfectly, either tracing from a printout or drawing freehand with your preferred stencils. You’ll want to create your initial outlines using an acrylic paint pen, Sharpie, or thin brush, ensuring each line is bold and well-defined. Once your outlines have dried completely, begin filling in the larger background areas with your chosen colors, such as green for the hat and scarf sections, and coordinating green and blue tones for the playful dog ear socks.
Base Layer Guidelines
The foundation of your window pane design begins with establishing clear, well-defined outlines that’ll guide your entire project. Start by placing your pattern underneath the inside of the window to guarantee proper scaling. You’ll want to work from the bottom of the window up, creating opaque lines with either an acrylic paint pen or Sharpie.
| Color | Element | Details |
|---|---|---|
| Green | Hat | Knitted texture |
| Green | Scarf | Check pattern |
| Green | Base | Main body |
| Blue | Socks | Stripes |
| Green/Blue | Ears | Dots |
Once you’ve traced your design, begin filling in the base colors. Apply green paint to the hat and scarf areas, incorporating the check pattern and knitted texture. For the dog ear socks, alternate between green and blue, adding stripes and dots. Let each section dry completely before proceeding with additional details or background colors.
Paint Application Tips
Now that your base outlines are in place, applying paint correctly will make or break your window design. Begin by mixing your chosen colors with a bit of school glue to help the paint adhere better to the glass surface. Apply thin, even coats using a small brush, working from the center outward to avoid smudging.
For best results, let each color dry completely before adding adjacent hues – this prevents unwanted blending. If you’re using multiple colors, it’s easy to make clean shifts by working with one section at a time. When layering colors, guarantee the base coat is thoroughly dry before adding details. To fix any mistakes, simply wipe the area with a damp cloth while the paint is still wet. Once all paint layers are complete, let it dry for 24 hours before handling.
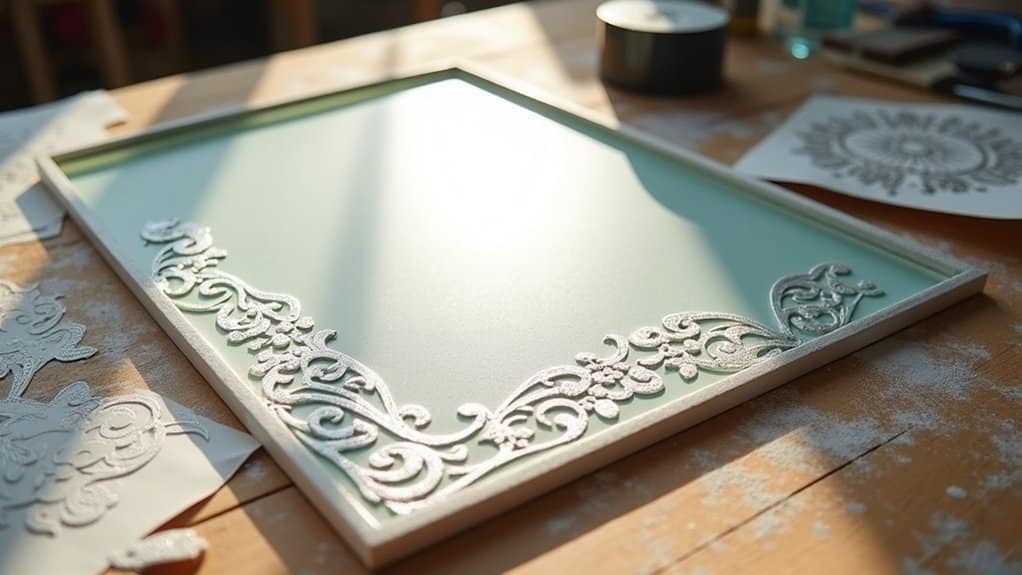
Incorporating Decorative Details
Ready to take your window pane project to the next level? Even though your window frame might look great with just paint, adding a little bit of decorative flair will transform it into a stunning piece. Apply vinyl lettering directly to the glass, making sure to reverse the design for a professional farmhouse look. For a rustic touch, staple chicken wire to the back of the frame and hang a grapevine wreath. You can also repurpose clean, ironed chicken feed sacks by cutting them into strips and stapling them onto the frame. The aged green fabric adds authentic farmhouse charm while keeping your budget in check. Mix and match these elements to ponder your own unique window pane masterpiece.
Finishing Touches and Embellishments
Final details can make or break your window pane masterpiece, so let’s confirm your project stands out. Start by cleaning one side of the window thoroughly, verifying there’s no residue that could affect your vinyl lettering application. You’ll want to position the reverse vinyl text on the outside of the window for a professional look that’s perfect for social media photos.
Add depth to your creation by attaching chicken wire to the back, then weave in vintage elements like aged fabric pieces or a rustic grapevine wreath. For a genuine farmhouse touch, incorporate repurposed chicken feed sacks into your design. Don’t forget to install a proper hanging system using contractor’s paper this final step validates your artwork will display beautifully and securely on your wall.
Care and Maintenance Tips
To keep your decorative window pane looking fresh and beautiful, establish a regular cleaning routine with the right supplies. You’ll absolutely love how simple maintenance can preserve your artwork for years to come.
| Task | Frequency |
|---|---|
| Gentle Cleaning | Weekly |
| Deep Inspection | Monthly |
| Sealant Check | Yearly |
The next step in preservation would usually involve careful storage when not displaying your piece. Keep it in a cool, dry space to prevent warping. Regularly inspect for any signs of wear, such as cracking or peeling, and address issues immediately. Remember to avoid abrasive cleaners that could damage your design stick to mild glass cleaners and soft, lint-free cloths. Every few years, consider reapplying a protective sealant to maintain those vibrant colors you worked so hard to create.
Frequently Asked Questions
How to Make Glass Windows Step by Step?
Start by mastering basic glass cutting techniques, ensuring clean edges with a reliable glass cutter. Next, plan your glass etching designs carefully you’ll want to use stencils and etching cream for precise patterns. Finally, apply glass painting patterns using special glass paint markers or liquid leading. Don’t forget to work in a well-ventilated area and wear protective gear throughout the process.
How to Make a Simple Window Frame?
To make a simple window frame, you’ll need basic window frame materials like pinewood boards and wood glue. Start your window frame construction by cutting boards to your desired size and creating pocket holes at the corners. Join the pieces together using wood glue and screws, ensuring they’re square. Once assembled, sand the frame smooth and apply your preferred finish. For window frame installation, secure it to the wall using appropriate mounting hardware and level it carefully.
How to Repurpose Old Window Panes?
You’ll love these vintage window repurposing ideas! Turn old panes into a stunning photo gallery by inserting family pictures behind each glass section. For upcycled window ideas, try creating a decorative window panel project by painting directly on the glass with frost paint or adding stained glass effects. You can also transform them into rustic mirrors, hanging herb gardens, or wall-mounted jewelry organizers. Don’t forget to clean and sand the frame first!
How to Make a Window Not See Through?
You’ve got several easy options to make your window not see-through. Create a stained glass effect using specialty window paint, or add privacy film that’s as simple as peel-and-stick. If you’re looking for something more decorative, use decorative window film with patterns or textures. All these options let light filter through while maintaining privacy. For a quick solution, you can’t go wrong with frosted window cling – it’s removable and won’t damage your glass.